Pal Tiya
  • Home
  • Inspiration
    • Projects
    • Oil Based Clay Artists
    • Mosaic Artists
    • Polymer Clay Artists
  • Praise
  • Get Started
    • Before You Begin
    • Planning
    • Armatures
    • Mixing
    • Sculpting
    • Curing
    • Painting
  • Shop
    • US Store
    • UK Store
    • Stockists

Diving Helmet: Make Your Own Outdoor Sculpture

By Yvonne Anderson | Feb 2021
Diving Helmet made with Pal Tiya Premium on beach
Sculpture making can often be a lonely affair so that’s why this project was so special. Two friends having a conversation that went a little something like this:

KIM: What do you want to make next?
JANE: An old diver helmet!
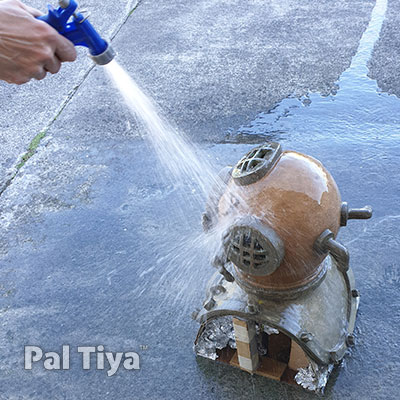
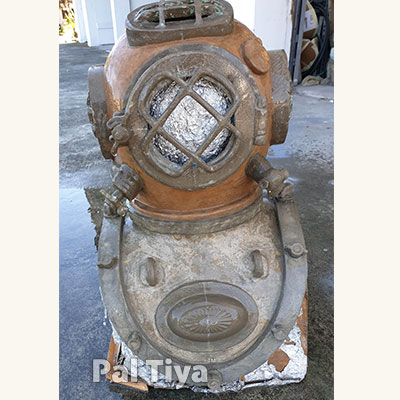
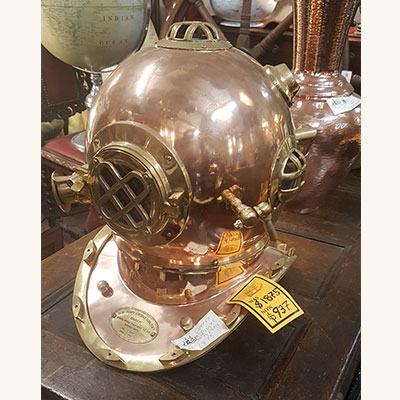
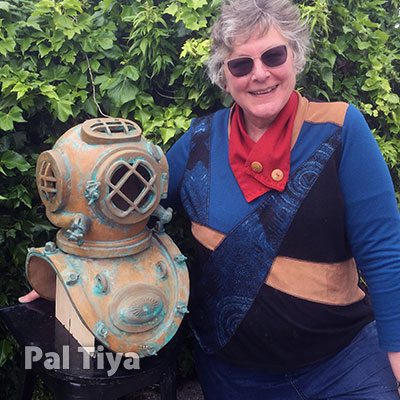
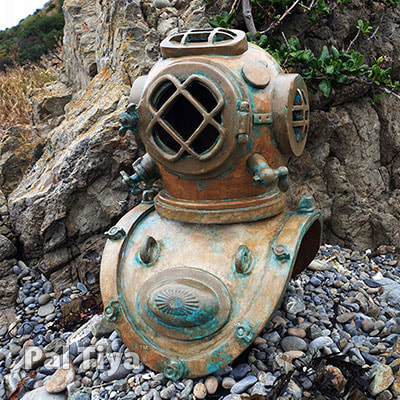
Diving helmets from the Victorian period are gorgeous to look at and Jane wanted one to go in her garden. It had to be robust and withstand the elements.
​

​First off, who are we and why do we love sculpting?
We're the crew from Pal Tiya International, and sculpting is what we care about. Between us, we've sculpted for decades and used every sculpting material on the planet (no joke). We created Pal Tiya Premium, a versatile weather proof sculpting material that is non-firing, and gorgeous to use. We share these stories to help thousands of our artists around the world to make the coolest stuff. Thousands of creative people across the globe have fallen in love with the possibilities of our medium. Kim is Pal Tiya International's Creative Director.

​
Jane was clear that her idea was a surprise to Kim. It was highly ambitious, and would need some precise work. But time was on their side and Jane said she would be patient. Jane is very creative, has some experience sculpting and is an incredibly talented painter. She also sews Victorian Steampunk clothes that are simply stunning.
Cost
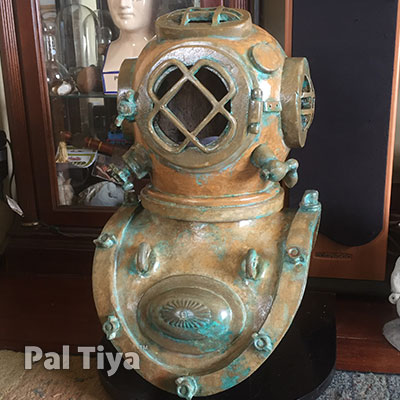
This homemade diving helmet, which can stay outdoors all year round in any weather, would cost approx US$85 to make as Jane and Kim used 19lbs, just shy of half a 40lbs Pal Tiya Premium (currently retailing for US$169.99). Tinfoil, hot glue, paints will be extra.

If you would like to see more projects like this and get more inspiration then please Join Our Community
Join Our Community
DIY Diving Helmet
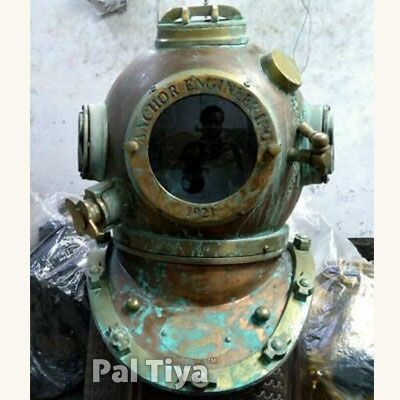
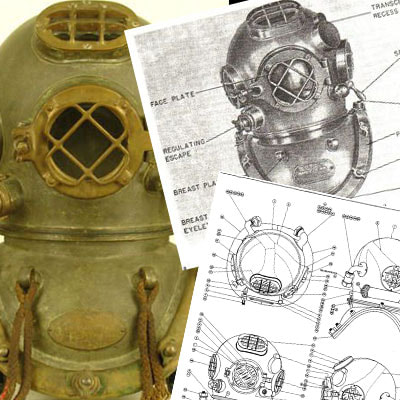
Making a vintage diving helmet led Kim and Jane on an amazing journey of research of the different kinds of old time deep diving helmets.
​They
collected photos of the most likely candidates for inspiration, and read schematic diagrams to understand what each of all the knobs taps and bumps were to make two dimensions into three.
Montage of inspiration and reference pictures
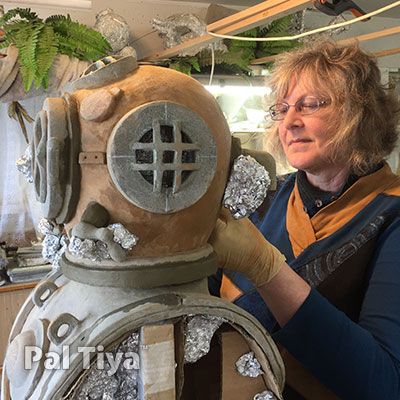
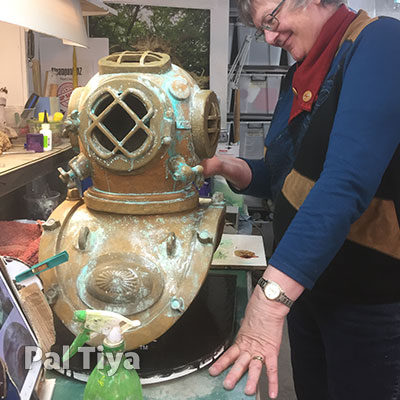
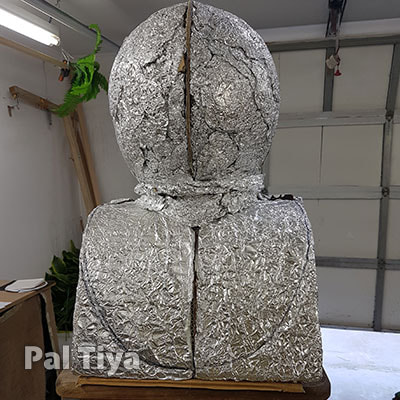
Kim and Jane began in March 2020 and worked 3 hours each Friday, till Nov 2020. One 4 week break was taken for the Covid pandemic.

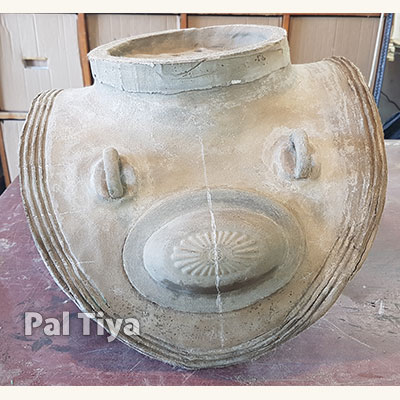
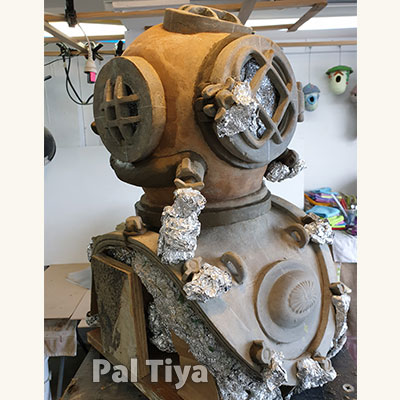
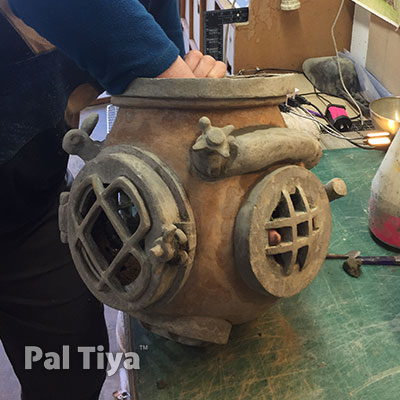
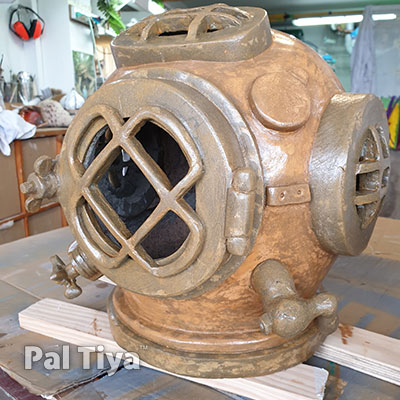
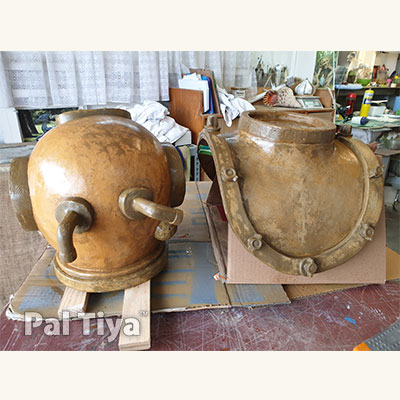
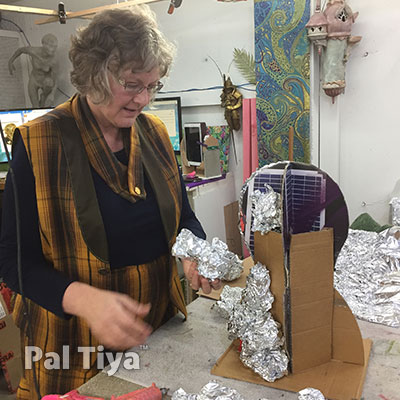
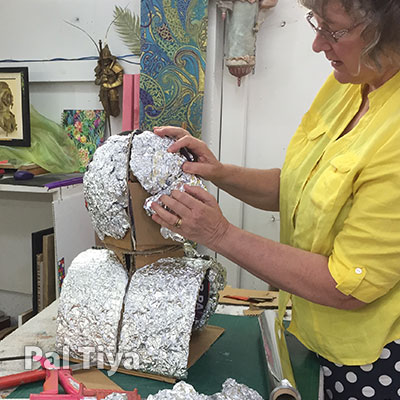
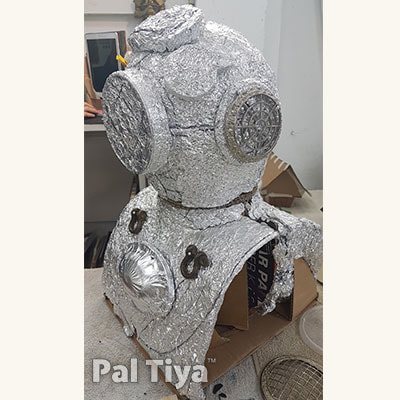
 It was a delightful, gentle project to do together over several months.


With almost all sculptures of this size that we make from our medium Pal Tiya Premium, we use cardboard, tin foil and hot glue to build out the armature shape. ​
Filling out the cardboard and tinfoil armature
Completing the tinfoil and cardboard armature
The completed armature for the diving helmet

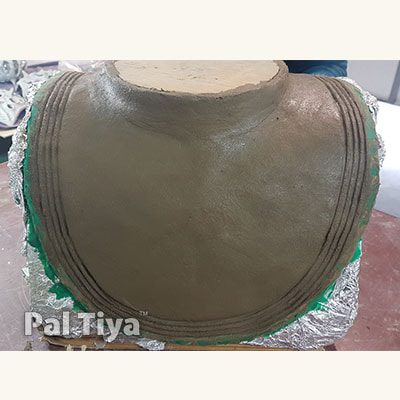
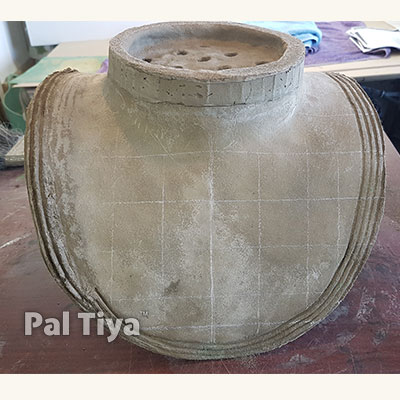
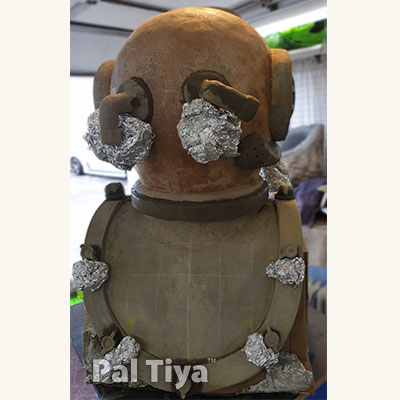
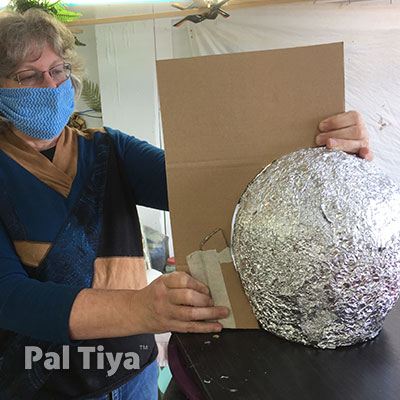
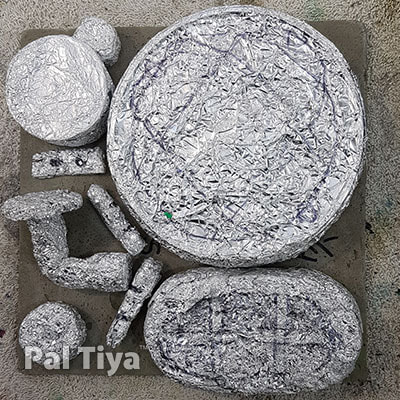
Just after Covid lockdown ended the ladies checked the correct outline with a cardboard pattern. The foil cores and temporary stand ins. These remaining components were pulled off the main body and prepped for coating. The ladies never ever used these but it reminded them to make the parts.
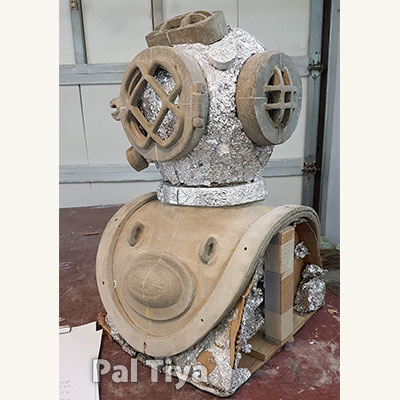
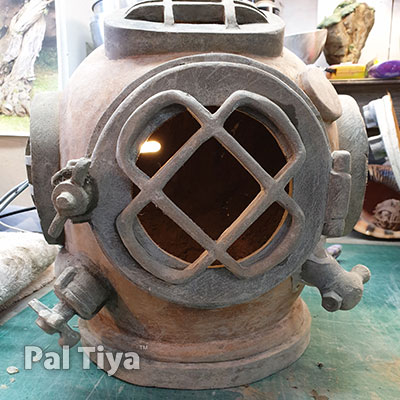
Jane wanted the actual helmet part to be separate from the shoulder plate as later she might want to put lights inside!
Checking symmetry of the diving helmet

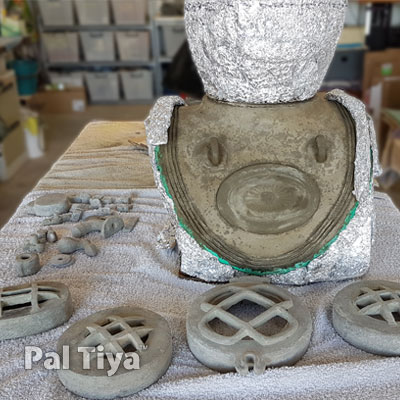
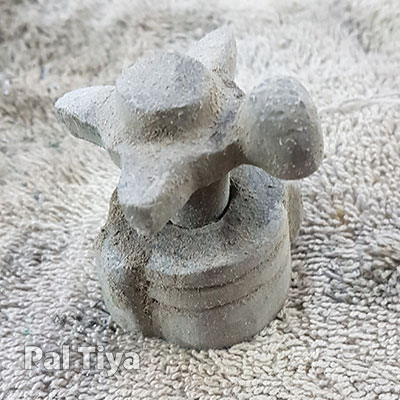
They made every single component separately out of foil, and in a way it could be removed. The pieces were held in place with sewing pins. The work could be checked and rechecked for size and placement till it was perfect. Each piece was manufactured separately in advance of the big core. This allowed each batch plenty of time to cure and strengthen.
For full curing instructions please visit our Curing page
Foil stand-ins for placement on armature
Armature with stand-in components

Making The Finer Details Of The Old Diving Helmet
​
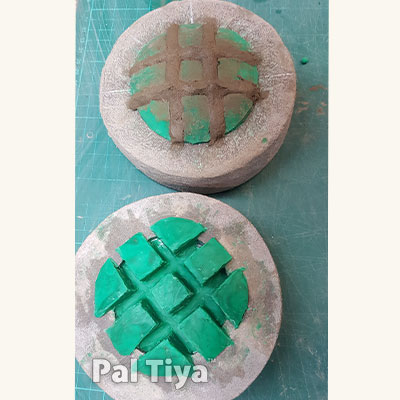
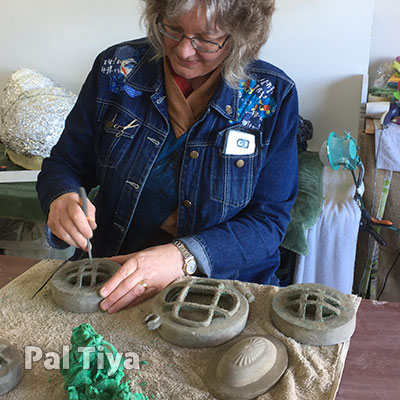
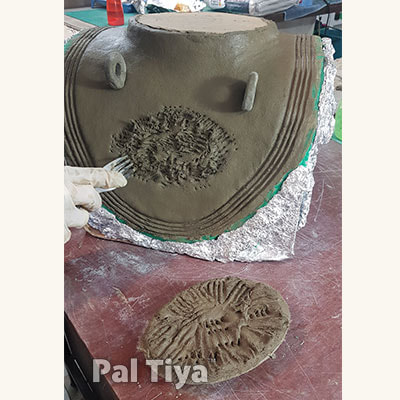
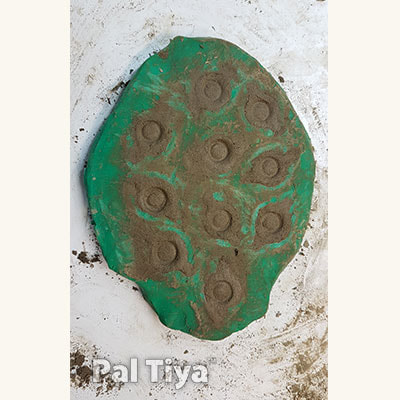
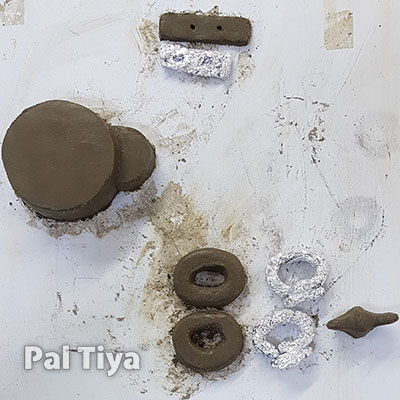
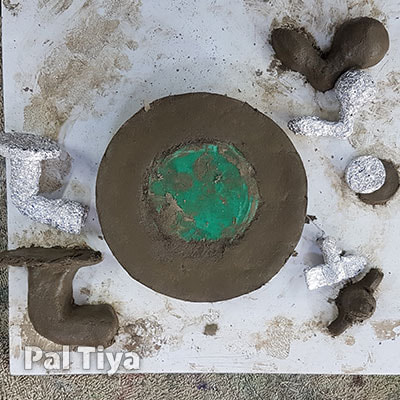
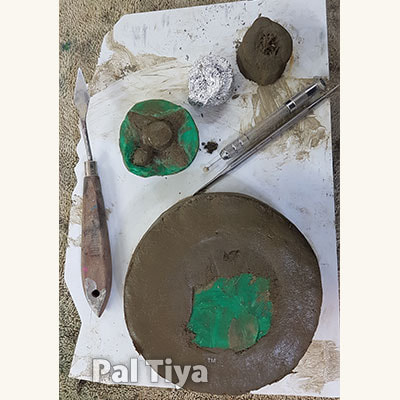
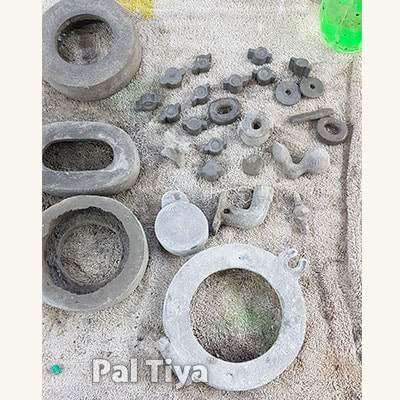
One of benefits of working with Pal Tiya Premium is that you can pre-make pieces of a sculpture at any time and attach it later (we'll show you how further down the page).

First, Jane and Kim made the lugs that would eventually go on the collar band.  They decided to cast in molds
they made using Newplast non-drying, re-usable modelling clay. They then cut the delicate complex shapes in the soft green clay and the holes were filled with the dough like, freshly mixed, Pal Tiya Premium. 
To find mixing instructions for Pal Tiya Premium visit our Mixing page
Newplast modelling clay mold for lugs
Making the lugs with Pal Tiya Premium sculpting medium
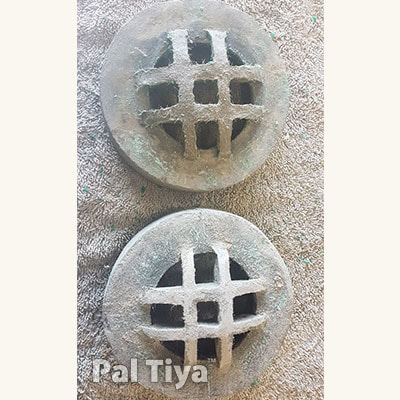
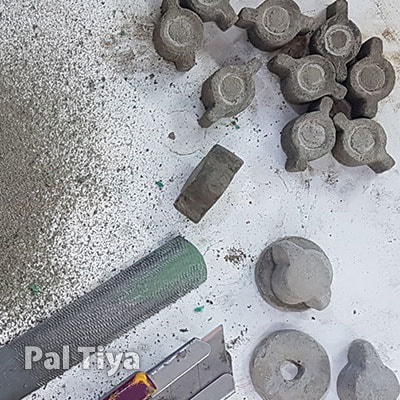
The lugs were then cured over the next week and cleaned with files and blades for crisp edges.
Cured lugs being cleaned and filed
They also made all the fixtures this way.
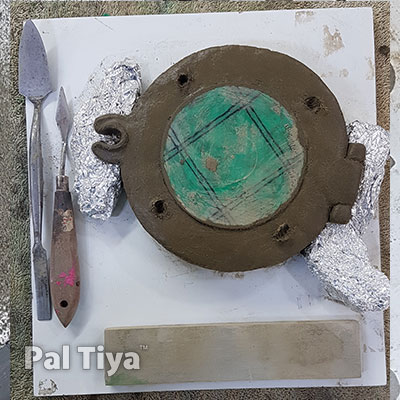
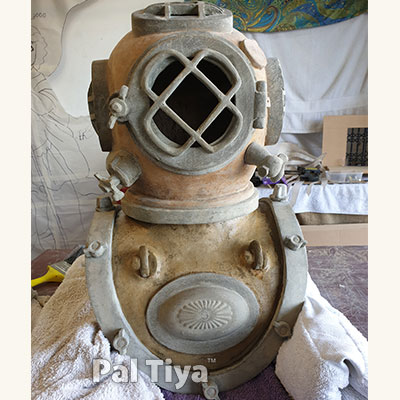
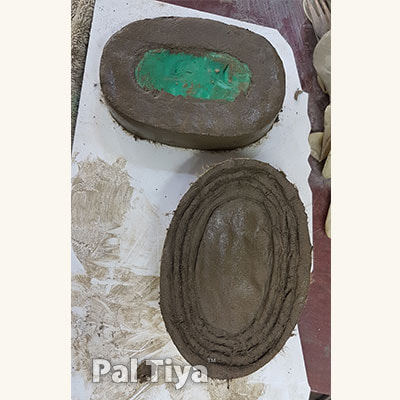
Making the main faceplate with Pal Tiya Premium
Coms panel and lifting rings with connector and flange
Coms panel & lifting rings with connector & flange
Left window and valve with pipe and second flange
Left window & valve with pipe & 2nd flange
Right window and large valve
Right window & large valve
op window center decoration
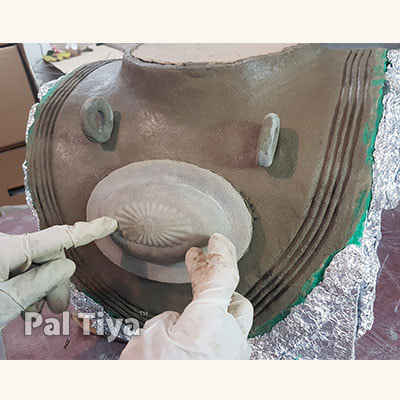
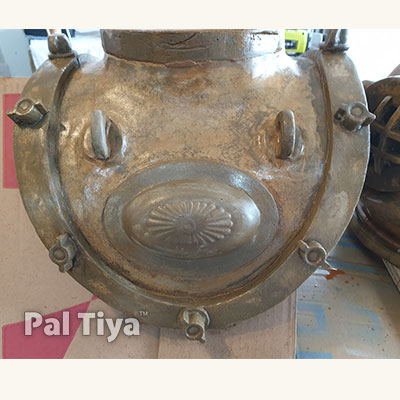
Top window center decoration
Cured components all cleaned and filed

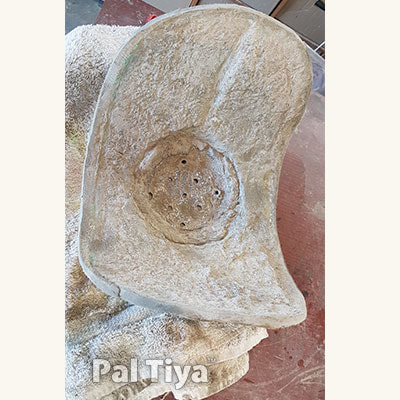
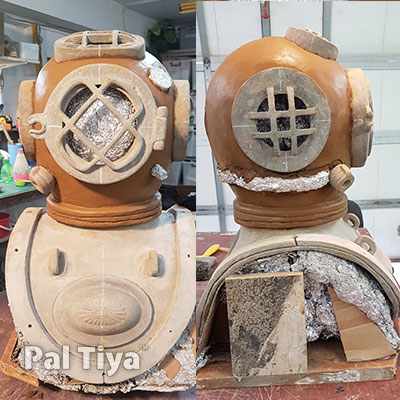
Once cured, the pieces were all cleaned with files, blades and sandpaper to achieve a smooth metal-like surface.  Matt knives and 80 grit sandpaper were used to achieve a smooth metal-like surface.
Close up of finished lug
Picture
"Compares to the high end water based clays...It's very elastic, lots of flex, it doesn't break or shatter."  After a day of use " ...the clay was fantastic, very immediate, exciting,  kind of exhilarating."  -Elijah Strongheart Stevenson

"Infinite opportunities for endless possibilities." - Bob Stafford
​
Picture
How does Pal Tiya Premium work?
You mix the powder with water to create a cookie-dough-clay-like mixture and apply it to your tinfoil armatures.

Do I need to bake or fire it?
Nope, Pal Tiya Premium cures under plastic with moisture?

Where can I learn more?
Get started here
Picture
Pal Tiya Premium is an extremely strong, all weatherproof, exciting to use, totally versatile sculpting medium. 
​Compared with other methods for outdoor sculpture, it is also an affordable way to make small to large outdoor sculptures that will last!
Some components needed further modification.  The windows needed protective grills (these protect the glass in the real versions, though we chose not to put glass in ours in the end) Newplast modelling clay was filled into the open hole and shaped to cast the grills into. This was the best way to get the complex edges and overlaps. Once cured, the green clay was removed and the grills sanded and filed. ​
Newplast modelling clay mold for window grills
cast grills
Filing and cleaning the window grills
finished windows

Sculpting The Core
The breast plate was coated with 6mm 
Pal Tiya Premium. A scratch coat (deep grooves made with a fork) were established to affix the collar bands on later.
You can find more information on scratch coats and 
sculpting with our medium on our Sculpting page.
Breast plate sculpted with Pal Tiya Premium
The plate components, lifting rings and decoration, were backed with a fresh batch of product and fixed in place. The lifting rings had no scratch coat because they were pushed into the Pal Tiya Premium and secured in place with more product. ​
Scratch coat to adhere decoration and lifting rings to plate
Attaching the decoration to the shoulder plate
Progress!
​One week later and all the components and breast plate with collar cured.
You can see they added a little more to the collar because it wasn't looking large enough and a scratch coat is present so they can add detail to it the next again week!

​
Cured breast plate with attachments
All components and breast plate cured

Jane and Kim scraped clean the collar and carefully drew a grid on with colored pencils to make sure it was perfectly symmetrical.
Cleaning the breast plate - back
Pencil lines drawn on breast plate
Back of breast plate with pencil lines
Fresh product was mixed and the collar bands were pushed into the grooves of the scratch coat and smoothed.
​Yellow marks remind
ed them to make securing holes for the lugs later.
Sculpting the collar onto the breast plate
​Pre-assembly of the head components gently held in place with sewing pins and tiny tacks of hot glue. Colored pencils are used to accurately place the pieces level and square. They wanted to ensure everything was A OK :)
Pre-assembly of the entire piece

Deep Diving Helmet
It was time to get out the big mixer! Jane and Kim wanted to mix a large enough single batch so they could do the helmet in one go without any seams.

They added 5% of brown oxide to the Pal Tiya Premium. Read our Painting page for coloring the product
Large mixer
The head was coated and most of the components were carefully affixed in place. Whoops! Oh no! They had grabbed the wrong color on the material! Oh well...mistakes happen and they figured they could correct it with the final paint finish later!
Then the friends sat and with the back of spoons they painstakingly worked the Pal Tiya Premium so it was ultra smooth...
Diving helmet being sculpted
As previously mentioned. As long as a scratch coat is present on the surface you wish to add to later, you can essentially use Pal Tiya Premium as the "glue" to connect parts. This way you can make and cure pieces ahead of time.
Attaching all the sculpted components to the sculpture
Jane got to work "gluing" on/or sculpting the final bits and pieces. They propped some of them with foil till they were strong enough. 
"Who knew there were so darn many pieces!?"  They again, left scratch coat areas where further pieces would be glued on the next week.
​
Since they had forgotten to put a scratch coat on the lugs, they had to use a hand grinder afterwards to cut a square edged notch into the bottom of each one. A bit harrowing, we don't recommend doing it this way. Certainly not for beginners! Far better to remember to put in the scratch coat at the right time ;) ​
Jane fixing components in place
Sculpture ready to clean

A Good Hose Down
The next week, the got the hose out and hosed down and scrubbed the entire sculpture. 
Hosing down the sculpture outside
Wet diving helmet
Then they got to work cleaning and tidying the surfaces, removing the tinfoil and cardboard from the inside now the sculpture was cured.
​The colored pencil lines came off easily with isopropyl alcohol.
Pulling out the tinfoil and cardboard armature
Cleaned helmet

Putting The Deep Diving Helmet and Plate together!
Assembled!! TA_DAAAA! Since Jane always wanted access to the inside, so as you can see, the head can be removed at any time.
Cured and assembled diving helmet
Painting Time
​​
Jane liked the copper helmets she found as a reference, like the one from the thrift shop and also the verdigris patina that occurs when weathered.
Thrift store copper diving helmet
Painting reference picture of old diving helmet
Commercial orange-colored concrete stain was used to harmonize the colors. Jeez, it looks so metallic! The irregular natural patterns looks very much like the real thing.
Jane and Kim were VERY happy with the result.
Painted helmet
Painted breast plate and collar
Diving helmet and breast plate side by side
Jane then used three colors of turquoise acrylic paint for the aging. A simple wooden frame was built to hold and display the helmet (sorry, no pictures of the frame separately).
Jane painting sculpture to look aged

​The colors harmonized beautifully. YAY! 
Finished, it weighs just under 22lbs/10kg ( approx 19lbs of PTP  when cured it holds 13% water weight) complete, has 35 separate components It sits at approx 19 inches tall.  The components were all cured by soaking in a container of water over the weeks and months.
Proud Jane standing next to her sculpture in garden
Finished sculpture in Jane's house
Enjoy some snippets of the project below!
"I found that there were really no limits to Pal Tiya Premium. To get the smooth metallic finish was easier than we imagined. The varying stages of curing allowed us to achieve the finish we wanted." - Jane Craven 

Want to know more?

Begin Your Journey Here
Copyright © 2013 - 2022 | Pal Tiya International Limited 
  |  FAQs  |  About  |  Blog  |  Privacy Policy  |  Terms and Conditions  |  Contact Us    
  • Home
  • Inspiration
    • Projects
    • Oil Based Clay Artists
    • Mosaic Artists
    • Polymer Clay Artists
  • Praise
  • Get Started
    • Before You Begin
    • Planning
    • Armatures
    • Mixing
    • Sculpting
    • Curing
    • Painting
  • Shop
    • US Store
    • UK Store
    • Stockists