
Mixing the perfect batch of Pal Tiya Premium
Make sure you've read the 'Before you Begin' section.
|
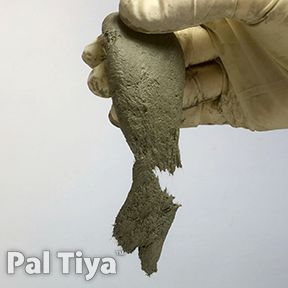
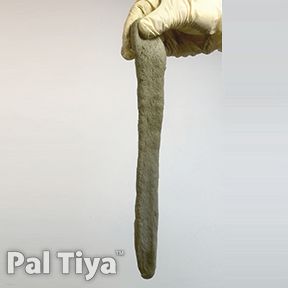
Our product, when mixed correctly should be the consistency of cookie dough. A dough…not a mud. If Goldilocks were to visit your studio and peer over your shoulder as you mix, she shouldn’t be saying “This batch is too wet” nor “this batch is too dry.” She should say “This batch is juuussssttt right.” When correctly mixed our medium should be able to be dangled like so. |
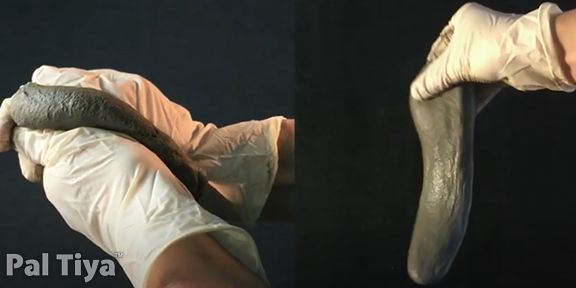
Mixed and dangling as desired
|
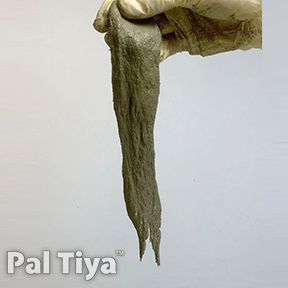
This batch is too wet.
|
|
|
This batch is too dry.
|
|
|
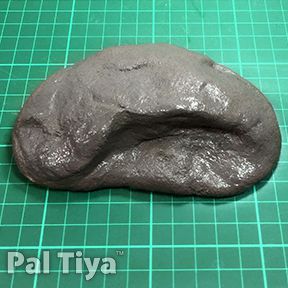
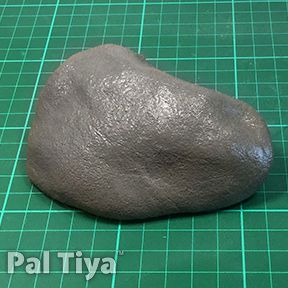
This batch is perfect
|
|
|
Pal Tiya Premium comes as a dry powder. When you first open your bag you’ll notice some fibers may have clumped together during the delivery to your house. We like to give it a stir to disperse these fibers evenly throughout the powder.
When mixed with water it should form a silky smooth 'cookie-like dough' for Sculpting with.
The mix ratio is about 4-to-1, Powder-to-Water, by volume (or 5:1 ratio by weight).
There are 2 ways to mix it:
Small amounts - By Hand.
Large amounts - By ELECTRIC (kitchen) MIXER (over 1Kg/2.2lb).
When mixed with water it should form a silky smooth 'cookie-like dough' for Sculpting with.
The mix ratio is about 4-to-1, Powder-to-Water, by volume (or 5:1 ratio by weight).
There are 2 ways to mix it:
Small amounts - By Hand.
Large amounts - By ELECTRIC (kitchen) MIXER (over 1Kg/2.2lb).
|
|
|
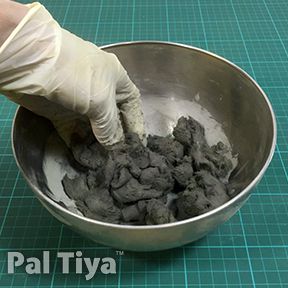
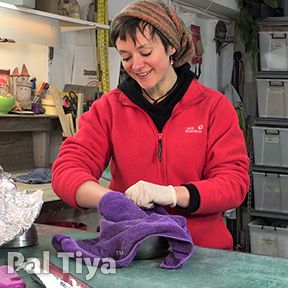
As our product contains portland cement you will require gloves when mixing and touching it.
You should always use a dust mask and/or a damp towel covering the bowl. --Mixing by HAND:
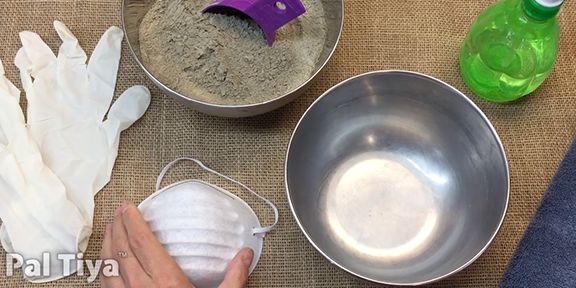
You will need: -Pal Tiya Premium. -Cold Water. -Mixing Bowl - Those round-bottom take-away bowls are just awesome for beginners. -Gloves - We find the disposable latex kind are best, experiment to see which 'feels' best for you. -Measuring Stuff. -An old towel. |
- First - put on the gloves.
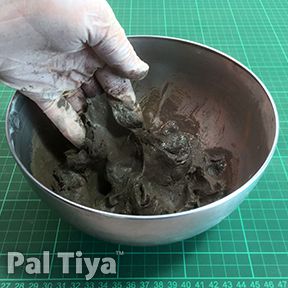
- Measure a level 1/2 cup (130g) of Pal Tiya powder into a bowl.
- Pour in a small amount of cold water, 2 level tablespoons (26g), and begin stirring with your fingers.
- It should quickly form into small pea-sized "balls".
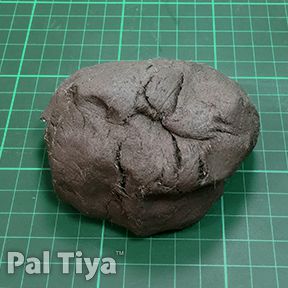
- Continue stirring until these balls begin to all clump together into a lovely lump of something like a silky-soft cookie-dough-like consistency. You can add more water - drop-by-drop - if you feel your mix still not getting to that 'silky' stage. So don't fret.
- When you're happy that your mix is 'just right' for you, remove it from your bowl and mix/knead between your palms for at least a minute. Don't forget to tell your friends how totally cool this part feels (we could honestly do this part all night!).
- If it has become too sticky/soft, no problem, just add a little more powder.
- If it is still too crumbly or stiff, just add a little more water, but just drop-by-drop. It's easy to get carried away.
- Remember, a few drops of water can quickly change your mix from stiff to very wet.
- Your clay should have a soft silky feel to it, but still be just stiff enough to shape into delicate flower petals.
- When the fibers are completely dispersed in the clay - and you cannot feel any tiny "clumps" - you are ready to sculpt.
Avoid using too much water!!
Pal Tiya Premium should always be mixed to a dough-like consistency.
If PTP becomes a too wet and watery (shiny) it will cure soft and weak. This is very important when gluing/attaching pieces together - we’ll show you all about this on our sculpting and textures page.
When blending edges, keep the PTP as close to a dough as possible.
We always recommend when first starting with Pal Tiya Premium that you mix it by hand. This way you’ll get the feel for the perfect mix.
If you want to watch us do this by hand then you can see that in this video here or follow along with us by hand and mixer.
|
|
|
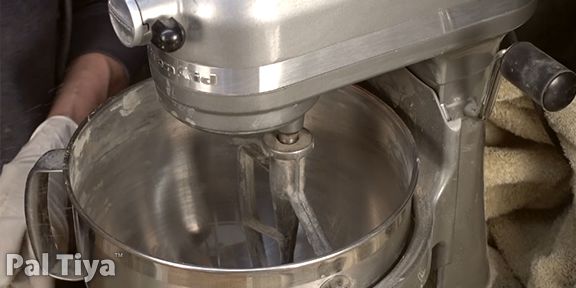
When you have mixing by hand down to perfection then you may want to use an old electric mixer (obviously don’t use this mixer for anything other than Pal Tiya Premium afterwards).
Mixing by ELECTRIC (Kitchen) MIXER:
You will need:
-Pal Tiya Premium.
-Cold Water.
-Electric (kitchen) Mixer. *Note: We use our old reliable beat-up "Kenwood Chef" 'planetary' mixer, but 'twin-beater' mixers do just fine. You won't be using it for food in the future mind ;)
-An Old Towel.
The great news is that once you have mixed PTP a few times, you’ll just know from the hand feel when it is ready to start sculpting with. It should and will feel amazing, like cookie or pizza dough!
Mixing by ELECTRIC (Kitchen) MIXER:
You will need:
-Pal Tiya Premium.
-Cold Water.
-Electric (kitchen) Mixer. *Note: We use our old reliable beat-up "Kenwood Chef" 'planetary' mixer, but 'twin-beater' mixers do just fine. You won't be using it for food in the future mind ;)
-An Old Towel.
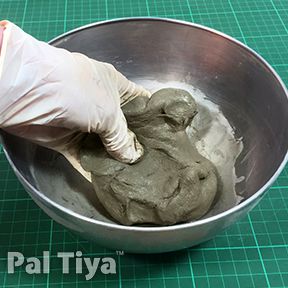
- Measure 2 Cups of Pal Tiya Premium and place in your mixer's small bowl.
- Add ' almost' 1/2 a cup of cold water.
- Drape a large dry towel over the whole mixer - to prevent escaping dust.
- Make sure the edges of the towel are draped well over the lip of your mixer's bowl (to prevent them from being caught by the beater head).
- Now turn your mixer on to it's slowest speed.
- Keep the mixer covered for the first 20 seconds until all of the Pal Tiya Premium has become moistened, then you can remove the towel and put it aside.
- Watch the mix carefully, and be prepared to either add more powder or a few drops of water (see above).
- The magic consistency is when the mix moves back and forth between the paddle and the bowl without sticking to either one. This takes about 4-5 minutes for a thorough blending.
The great news is that once you have mixed PTP a few times, you’ll just know from the hand feel when it is ready to start sculpting with. It should and will feel amazing, like cookie or pizza dough!
WORKING TIME
Once mixed Pal Tiya Premium will stay in what we call the “super plastic state” for approx 15 minutes. After that, Pal Tiya Premium will begin to gradually firm-up ready to begin sculpting your detail work. For fine detail and texture you will have another 2 hours to finish that section.
The optimal working temperature for our product is 61-70 Degrees F. (16-21 degrees C). Much hotter than that, and the material will start to cure faster. Using very cold water will slow down the cure time.
Once each batch of Pal Tiya Premium is mixed, you'll generally have around 15 minutes working time for spreading it out onto your basic shapes.
After that, your material will settle and begin to stiffen, just a little (you can invigorate it once by adding a tiny amount of water to bring it back to a super plastic state). We do this by spritzing with a fine mist of water.
This is the best time to begin sculpting in all of your lovely details.
For fine detail and textures you will have another 2 hours to finish your work with that batch.
Then? Go and mix another batch of course.
So exciting! You’ve planned, made your armature and mixed your batch and now you’re ready to learn all about sculpting with Pal Tiya Premium!
Visit our Sculpting page to get going with applying this lovely batch you just mixed.