Make your own DND terrain: unique & exciting!
By Kim Beaton & Yvonne Anderson |Feb 2022
Building your own dnd terrain can be a fun project to do.
Who are we?
We're the crew from Pal Tiya International, and sculpting is what we care about. Between us, we've sculpted for decades and used every sculpting material on the planet (no joke). We created Pal Tiya Premium, a versatile weatherproof clay for outdoor sculpture that is non-firing, and gorgeous to use.
Thousands of creative people across the globe have fallen in love with the possibilities of our medium.
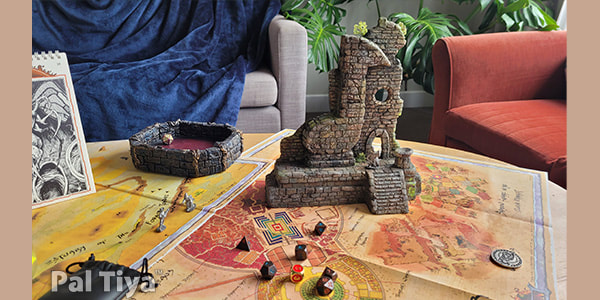
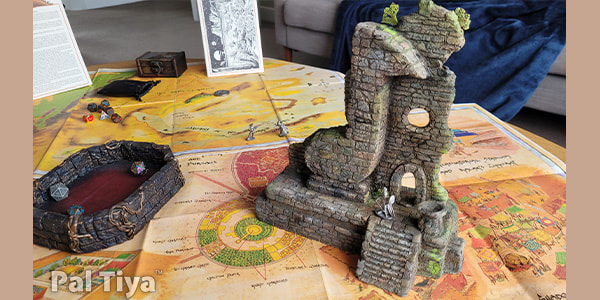
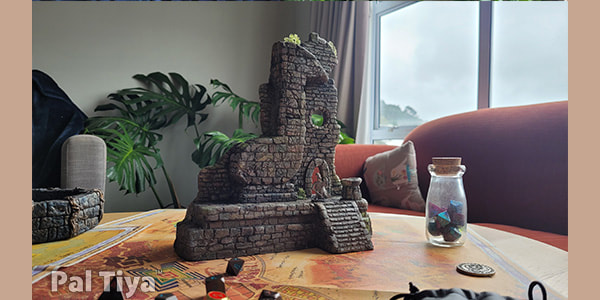
Our friend Issac was delighted with this musical note for his Musical Academy and had the tabletop all set up for us to take pics!
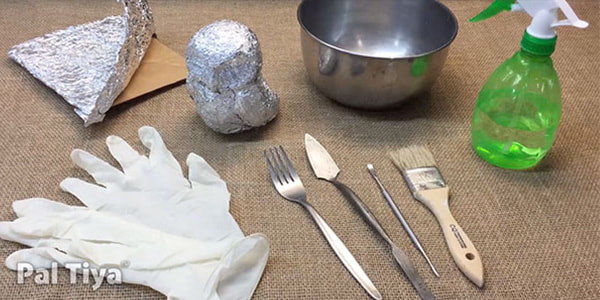
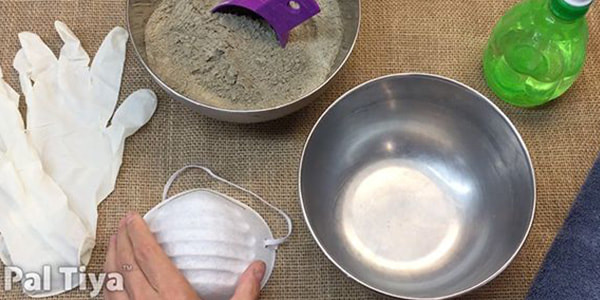
Tools for the Best DND Terrain
|
Sketching & Foil
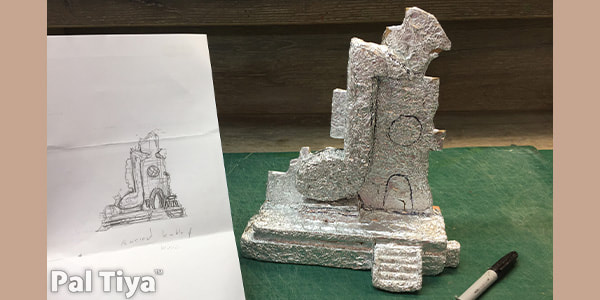
This dnd terrain piece began by making a small thumbnail sketch of the idea. The sketch didn’t need to be elaborate, just enough to see the outline and major forms. As tabletop miniatures go, about 6 inches (15 cm) seemed the right size. We didn’t fit it to a specific size wargaming figure, just what felt right for a fun little tabletop piece. The extra ruined steps etc make the whole sculpture 8.5 inches tall. |
|
To save time, a block of wood from the scrap bin was chosen for the base. This gave the full volume, and square edges instantly. A cardboard cut out was used to fill in the remaining wall behind the music note. This was covered in foil to prevent it getting wet from the Pal Tiya Premium. The elevated bands around the base and staircase are foil. Total build time to a complete foil core, about 1.5 hours. Essentially it's just a box with music note and a few bands of crushed foil.
|
The whole piece was mounted on a larger cardboard base covered in more foil. This lets you hold the sculpture without touching it. Very helpful when sculpting it upside down or sideways.
Mixing & Applying Pal Tiya Premium (PTP)
Once you've mixed Pal Tiya Premium right once, you'll always be able to do it again! Get it right by following these instructions and visiting our Mixing Page
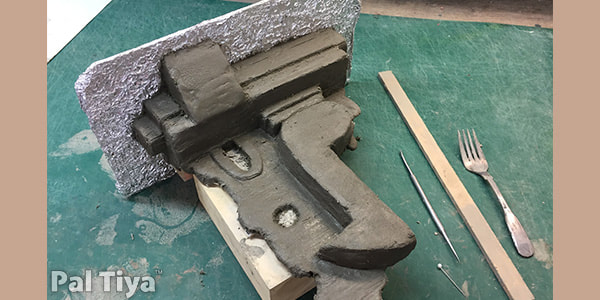
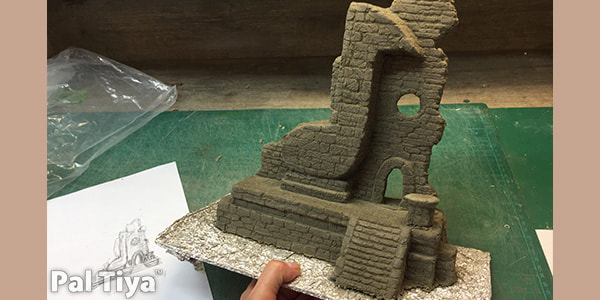
A small 1 cup batch of PTP was mixed up and applied really thinly 3/16 inch (5mm) over the whole surface. To make it a uniform depth, we leveled the surface using a fork first. Lightly make cross hatch lines with the back of the fork in wildly random directions. Because the PTP squishes up between the tines, the surface will level really quickly. Then smooth with a trowel. Since it's tiny and meant for display only, we can go directly to the detail coat. Besides, the back will be filled in on a later day.
|
Now here is the ridiculously easy part: making the stones/bricks.
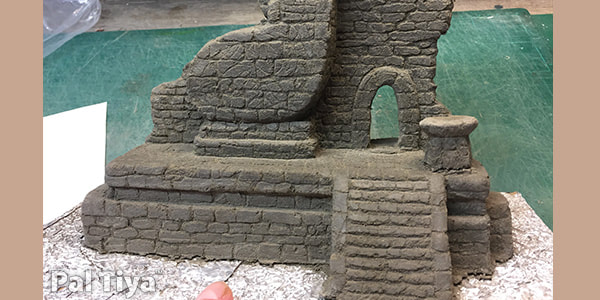
Step 1 - get a large sewing pin, the kind with the big round ends, about 2 inches (5 cm) long. Step 2 - Drag the pin across the surface just slightly pulling up the fibers. Voila’ the pulling of the fibers causes the edges of the stones to pull up and crackle just like real stone. As fast as you can draw little circles on the surface, it works! The best part … as the PTP stiffens over two hours the effect gets better and more crackly. Go deep, go bold! It took about 3 hours to draw in all the tiny stones and make them really gnarly. Total time including sketching out the idea, about 5 hours for the first day. Since the piece is the size of a person's open hand, there isn't much actual surface area to sculpt. This thing is quite small. |
Curing & Strengthening
Pal Tiya Premium is ridiculously easy to cure and strengthen. Wrap your tabletop terrain in plastic overnight to strengthen.
Next day
|
The next day the surface was a lot stiffer. It took 20 minutes to deepen some of the trenches between some of the stones, making it look a lot older.
The tabletop piece was now strong enough to remove the foil from the back of the wall. Just the wall! All the remaining foil in the music note, stairs and base were left. Even the block of wood. Why bother taking them out? A tiny ¼ cup of PTP was mixed up and applied to the back of the wall to bring it up to ½ inch (12mm). This way, the window, doorway and the edge of the wall would appear to have the correct depth for a building this tiny. All this was just an hour's work. The sculpture was wrapped in plastic again and let set for a few days to strengthen further. On the second day, cover the sculpture in a wet towel then re-wrap it to under plastic to make it super strong. This is a small piece and it's always a good idea to make them robust for future handling. Full curing instructions for the curious right here |
Cleaning
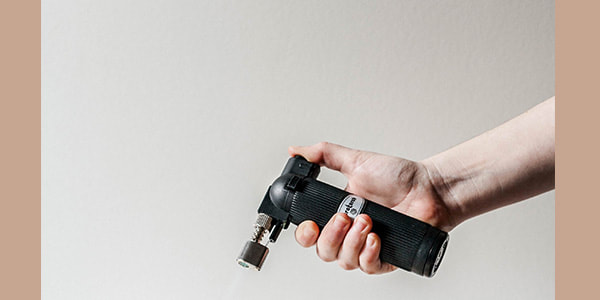
After a few days the dnd terrain piece was unwrapped and the edges cleaned with a rasp. Any unwanted fibers were burned off with a propane torch (do this in a well ventilated room!!)
After a few days the dnd terrain piece was unwrapped and the edges cleaned with a rasp. Any unwanted fibers were burned off with a propane torch (do this in a well ventilated room!!)
Painting your tabletop miniature
Painting was super simple. Follow this set of steps, always working from the lightest color to the darkest. Acrylic paints are best. If this will go outside, then use exterior grade acrylics.
Painting was super simple. Follow this set of steps, always working from the lightest color to the darkest. Acrylic paints are best. If this will go outside, then use exterior grade acrylics.
Drybrush white onto the high spots. Dry with hairdryer.
Paint randomly about ⅓ of the stones a pale washed out red color. Dry
Paint randomly about ⅓ of the stones a pale washed out blue color. Dry
Paint randomly about ⅓ of the stones a pale washed out yellow color. Dry.
It will look hideous at this point, but bear with us on the process.
Dip a toothbrush in the red paint and spatter it lightly all over. Dry
Do the same with the blue and yellow paint. Dry.
The spattering pixelates the surface. It causes each of the primary colors to be uniformly distributed on the surface but not blurred. A red brick will now have clear blue and yellow dots within it, but these wont have blended into an icky muddy color. The spattered dots keep each color true and clean.
Aging wash. This is where miracles happen. Dilute a dark chocolate brown color. Wet the whole sculpture and paint over the entire piece. Quickly daub and rub it off the high spots.This will leave the dark stain in the crevices. Immediately it looks to be an old ruin! Dry thoroughly and do it one more time with black. With the black, only apply this wash in the deepest areas and corners. Otherwise it will darken your whole piece too much. Dry.
Lastly, green. Wet the entire piece with water and daub a bright yellowy green on areas where plants would grow. The paint will blur and drizzle across the surface naturally. Rivulets will find the tiny cracks and follow them down to pool in the right places. Dry
This simple set of steps consistently gets a good effect, which is why we always use it. It is a dependable way to get old rocks, bricks and stones.
This is a fun small project which can be built with a few hours, over a few days to a delightful finish.
Build your own unique and exciting tabletop terrain pieces for DND and let us know how you go!
We have $8 off a Trial bag of Pal Tiya Premium... you could make 3 tabletop miniatures with this bag.
What will YOU make?

