Great Unique Water Feature - Terry Pratchett fans will LOVE
Written April 2023 Kim Beaton & Yvonne Anderson
On December 8, 2022, Chris Menges, Cassie Lopez and Pal Tiya Int Co-Founder,Kim Beaton decided to make the Great Atuin as a giant water feature for the garden.
They are all fans of Terry Pratchett, and wanted to do his work justice.
GNU Terry Pratchett <3
Watch the video for an in depth look at how this giant water feature was made. We have literally hundreds of photos and have included a few below. There will be many parts to these videos and this is part 1. Enjoy.
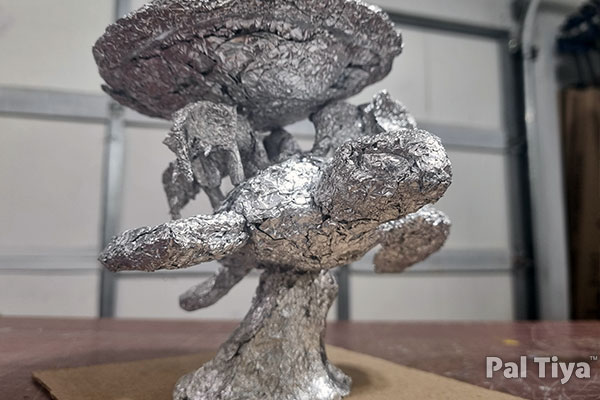
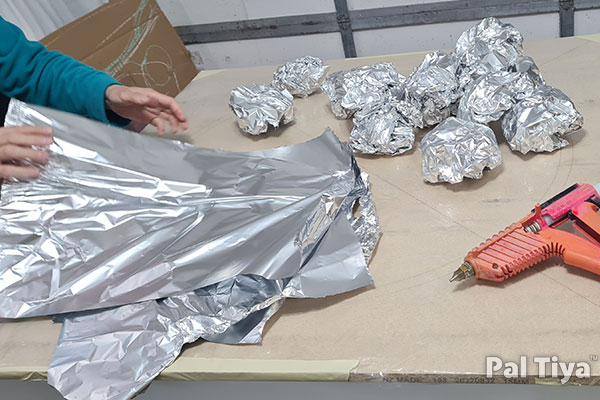
They made a small maquette in foil, to see what the Great Sky Turtle A'tuin water feature looked like in 3D space.
This amazing project eventually encompassed the effort of 20 volunteers over 3 months and innumerable puns. It was an amazing journey. The combined love and admiration for the work of Terry Pratchett kept everyone inspired throughout.
This amazing project eventually encompassed the effort of 20 volunteers over 3 months and innumerable puns. It was an amazing journey. The combined love and admiration for the work of Terry Pratchett kept everyone inspired throughout.
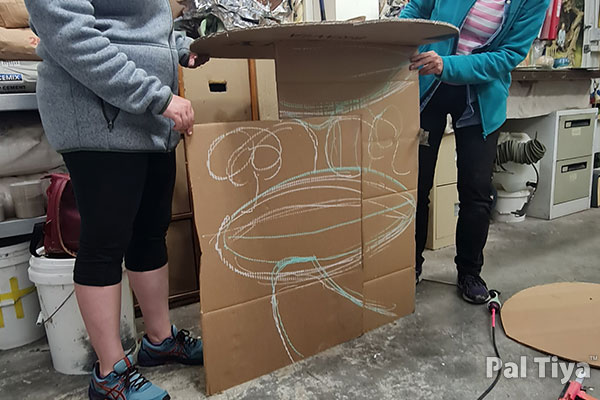
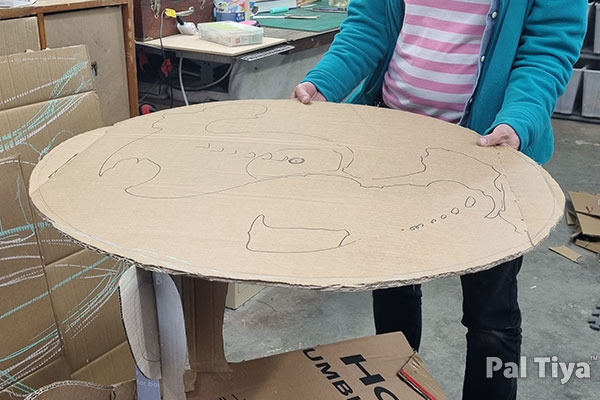
To begin they had to determine its ultimate size. They simply sketched it with chalk on cardboard till it felt right. They then made cardboard cutout silhouettes to get a real sense of the volume and shapes quickly.
The Disc ended up being 2.5 feet across. A Map of the Discworld printed in color actual size helped enormously.
Every component on this journey was strengthened and cured properly. Each piece was wrapped in plastic the first night, then unwrapped, draped in wet towels and covered in plastic again. All the pieces were ultimately wet cured for the full 28 days. This piece was worth the extra attention.
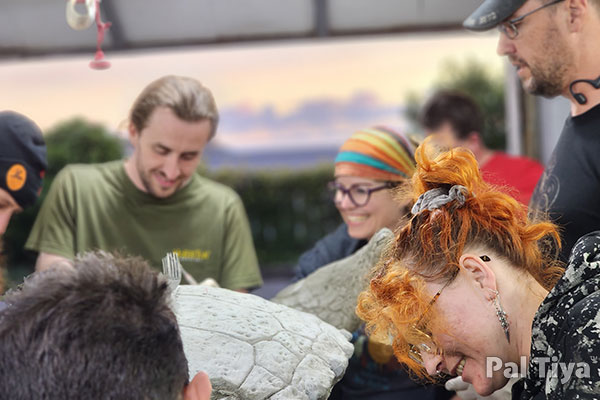
The small team began humbly, we gathered together every Monday and Thursday evening after work, from 6:30 to 9:30 pm. Each session saw new and familiar faces come together as folks heard about the project and asked to come along. Everyone was welcome. It was a gentle, kind and collaborative endeavor.
Magic happened, we made a magical turtle and loved the whole world.
The first task was to make the bottom of the disk. This had to be extremely level so we used a big board covered in plastic. The plastic allowed us to remove it later and keep the edge sharp. The rocky forms were built up with foil and scratch coated in Pal Tiya Premium (PTP). Here the PTP is white because there was some pre-mixed oxide batch, which was left over from a prior commission. The disc bottom was cured for several days.
We then lifted it off the board.
To create the colored water edge, blue oxide was added to the Pal Tiya Premium. Then mixed and applied to the board within the circle radius and the scratch coat bottom was bedded into it. This made a wide, deep, blue, perfectly flat edge for the birdbath.
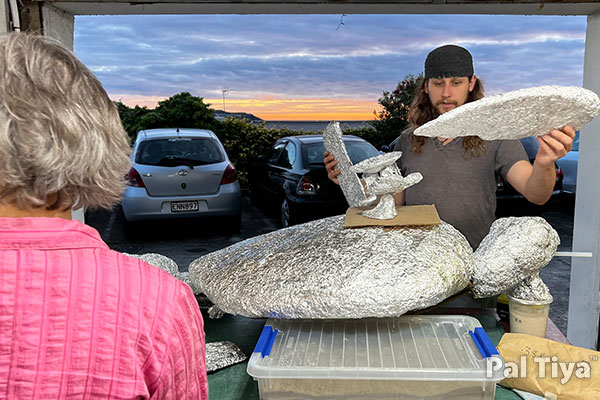
The back of A’tuin's shell, head and fins were filled out with foil. This gave us a sense of the total mass of the figure.
Hmmmm, the water feature armature seemed to be getting bigger, which we all liked.
We created the 4 elephants; Tubul, Jerakeen, Berilia, and the Great T’hon in cardboard silhouettes, then bulked them out with foil. Posing them mangled the foil and cardboard a bit, but that's ok. That’s the point. Foil and cardboard are modifiable cores perfect for establishing dynamic motion, then holding the pose.
We decided that the whole idea behind the elephants is that they act as shock absorbers while A'tuin banks through space. We caught them in a moment where they are scrambling to keep that disk level during a very dicey curve!! This of course makes sense in a very Pratchett way.
Each elephant was responding to the banking in a different way, either crouching down or rearing or just holding on.
Building out the base with foil. This represents the intergalactic space A'tuin swims through. Lovely nouveau sweeping lines. Annnnd turned out to be way too short, so we built the base higher :)
The base scratch coat is also in white Pal Tiya Premium, the same leftover color from a prior commission
Checking the fit. Oh my, it is soooo much taller!!
The base scratch coat is also in white Pal Tiya Premium, the same leftover color from a prior commission
Checking the fit. Oh my, it is soooo much taller!!
Part 2 - All About That Base
Building out the base with foil. This represents the intergalactic space A'tuin swims through. Lovely nouveau sweeping lines. Annnnd turned out to be way too short, so we built the base higher. The base scratch coat is also in white PTP, the same leftover color from a prior commission.
Every component on this journey was strengthened and cured properly. Each piece was wrapped in plastic the first night, then unwrapped, draped in wet towels and covered in plastic again. All the pieces were ultimately wet cured for the full 28 days, we knew that kids might hang on the head or fins.
This piece was worth the extra attention.
We've also included a little bonus behind the scenes on machine mixing and scratch coat technique explained. This batch is mixed with white oxide, the normal color is dark grey.
|
|
|
Part 3 -Start of The Star Turtle Shell
The shell was also scratch coated in white (pre-mixed oxide powder batch from previous commission). Just the top part. It was important to have this in two pieces to open it up and clean the insides.
Just to be clear, we didn’t have a set plan, we just knew the direction. Each session was to look at what was in front of us and decide what we did that day. Whoever showed up made the decisions. It was all very democratic and collaborative. Sometimes we had to back out of a decision and redo. So? The idea was to have fun and make cool things. We had no idea so many volunteers would come to help. Just goes to show how many people love the work of Terry Pratchett.
Just to be clear, we didn’t have a set plan, we just knew the direction. Each session was to look at what was in front of us and decide what we did that day. Whoever showed up made the decisions. It was all very democratic and collaborative. Sometimes we had to back out of a decision and redo. So? The idea was to have fun and make cool things. We had no idea so many volunteers would come to help. Just goes to show how many people love the work of Terry Pratchett.
Part 4 - Constellations on Base
The base was texture coated in black and blue tinted Pal Tiya Premium swirled together. One of our group discovered the actual constellations from the books. These heavenly animals were embellished with glass beads and stones as stars. We made up some for laughs :)
Time to cure & strengthen once again...
Time to cure & strengthen once again...
Arts & Crafts Time
Time to make a pattern directly from the map so the continents can be accurate. We had planned on spray mounting the map onto cardboard to make the pattern and cut out the landmasses. We were saved from this hand done method by Steven Saunders from Scale Studios.
Steven provided us with a laser cut outline of the continents in MDF so these could be as accurate as possible. Thank you Steven!! We cast a scratch coat with yellow Pal Tiya Premium on a plastic covered board so it was truly level.
A'tuin is ancient and we felt that the shell should show the same lineage of impacts as the moon’s surface. Very craggy, pock-marked and textural.
Time for the disc top! The foil has been shaped to make room for the seas and oceans. We begin with a white scratch coat covering the entire inner surface. (Yes, still using up the extra pre-oxide mixed powder from the prior commission). By doing a single layer it makes the disc waterproof by being a monolithic coat. The yellow continents are embedded into this layer and brought up exactly to surface level. Cori Celesi, the great ice mountain in the center, is reinforced with a stainless spring steel.
The bottoms of the ocean were sculpted in dark blue Pal Tiya Premium with careful submarine landscaping. We kept thinking how much the birds would like some deeper areas for a proper bath.
To make sure the continents and sea would never fade, they were done in Scagliola. All the landscaping and mountain ranges were Pal Tiya Premium, tinted in colors of ochre, green and white then sculpted by the team. The landmasses are enhanced by the impressive size of Cori Celesti, Disk World's large pivotal mountain.
Turtle Gets a Shell
Detail coat on the shell! First we drew on the shell scales to understand the edges. Each scale patch was coated separately and then we added meteor craters. All hands on deck!
We foiled the bottom of the shell, and sculpted it in a single session. We made so much extra Pal Tiya Premium, we just plowed ahead and did the scratch coat and detail coat in one single pass. We also cleaned out all the tinfoil.
The disc is going to be really heavy, so we must devise a way to transfer all the weight from the disc, through the elephants, though the turtle, past the base and to the ground. We decided on an internal pipe situated under the butts of the elephants connecting the top and bottom shell. You will see all of this in the video below.
While we had access to the inside, it was necessary to create the connection between the bottom of the turtle and the base. A socket hole was formed around an ice cream container inside Atuin’s chest. The corresponding post was cast in another ice cream container and set on the base. This makes a perfect fit because the ice cream containers nest inside each other.While we had access to the inside, it was necessary to create the connection between the bottom of the turtle and the base. A socket hole was formed around an ice cream container inside Atuin’s chest. The corresponding post was cast in another ice cream container and set on the base. This makes a perfect fit because the ice cream containers nest inside each other.
The top and bottom shell with the supporting cylinder are glued together today. All the components were “buttered up” with a lot of Pal Tiya Premium and squished together. The seams were then cleaned and sculpted. At this point, the back of the shell can accommodate an astonishing amount of weight.
Elephant LOVE
We decided that the whole idea behind the elephants is that they act as shock absorbers while Atuin banks through space. We caught them in a moment where they are scrambling to keep that disk level during a very dicey curve!! This of course makes sense in a very Pratchett way.
Each elephant was responding to the banking in a different way, either crouching down or rearing or just holding on.
We took the time to improve the elephant anatomy to become more clear. The tusks were made separately and reinforced with spring steel and will be added later.
The elephants all sit under the level of the disk. They have to, otherwise the inhabitants of the disk would have discovered their existence centuries before. The elephants have been glued on lightly so they can be removed later.
The bodies are given a light scratch coat. Especially with the elephants, this will hold their bodies in the right pose as they are removed for detailing. We are leaving the heads, trunks, and ears for later. These will need careful attention to get the gesture of each right.
Scratch coat was done on the elephant bodies.
Detail texture on the right side of all the elephants. This way the elephants could be handled and turned around without smashing the fine details. Sill no faces yet or ears. These important detail will wait till the end. Left side of the elephants.
Once the details were established on the elephants, it was time to hollow out their bums. These need to be backfilled solid with Pal Tiya Premium to transfer the weight from the disc, through the elephants, through the turtle, to the base. Some require the legs to be hollowed too. It depends on whether an elephant is standing or sitting on the shell.
Now that the structural work is done on each of the beasts, final detail can be carefully modeled into the faces! This may all look like extremely rough texture, but trust me, it takes loud, aggressive details to read on such small figures. The trucks all have a stiff Aluminum wire core to prevent these delicate parts from getting damaged.
We rinsed the elephants and wrapped them for curing.
All details on sculpting, curing etc can be seen on our Get Started pages
Mistakes & How to Fix Them
Scaffolding was made to position the fins and head as a separate piece which we plan to make removable. The shell was getting heavy and we thought we may not be able to lift it.
The scaffolding is sticks hot glued together. Since these rarely align, we use foil to fill in and strengthen any joint that does not meet flush. This is a very handy technique to secure straight flat pieces to, say, the curved shell.
The fins, head are given a scratch coat of Pal Tiya Premium. Texture was given to the fins too.
CHANGE OF PLAN!
We decided to take off the fins and head and each is being reinforced with rebar and chicken wire and put back on.
Why?
Because people will tend to lift by grabbing the fins. These will need to be strong enough to hold the considerable weight of the turtle and elephants. Once a fin, rebar and chicken wire was in place, we buttered up the inside and connection points. These were held in place with more scaffolding till it could cure. The back fins were scratch coated into the back of the shell with chicken wire at the same time.
Sometimes you have to back out of a path and redo work so it is right. Ultimately, what matters is the sculpture is built correctly. It may take several goes, reversals, and destruction. That's ok. Never let a project bully you into a bad decision!
The top side of the back fins were done.
After curing, we needed to tip the turtle on its back so the underside could be worked on. We transported it for grinding...
The bottom of the fins got a bit fat and the edges needed to come to a more graceful edge. Cue Chris, a grinding hood, and a good hand grinder to tidy up the shapes. He also cut in a new scratch coat for better grip for the detail layer of Pal Tiya Premium.
All fins on deck! We sculpted the underside of all the fins. A trick to make sure all the fins looked similar was to have the party rotate around and switch positions every 15 minutes. This way the scales were established by one team, corrected by another, further detailed by the next and finally made gorgeous by the last.
We hope you enjoy watching this video!
Turtle Face & Rocks
To commemorate everyone’s hard work, the base was cleaned out and each of the volunteers signed the inside with their own patch. Thick reinforcing bands were added around the middle, bottom edge and top to bottom to make the already strong base more robust.
Time to glue on the elephants. Deep scratch coat-like grooves are cut with a hand grinder into the shell. These are directly above the internal support cylinder.
The grooves in the shell are first buttered up, then supporting sticks are attached to hold it in place for curing. The hollow back of the elephant is filled up to level. All the textures are re-established so the blend is invisible.
A’Tuin's lovely face is also completed.
Final day of sculpting. The disc was flipped upside down and Cori Celesti, the great mountain was carefully elevated on supports. The underside of the disc was then textured to look like a vast mountain. Lots of tiny craggy features, fissures and strata.
The sculpture is now wrapped entirely and allowed to strengthen for the next month.
Prep for the Paint Job...
FYI - we don't normally do a wash of citric acid on our pieces, we normally just scrub em down with water!
We did do this on this particular piece simply because it was such a huge sculpture. You don't have to do it.
This particular piece was filled with so much detail, we would have scrubbing for hours. We wanted to do it fast.
We simply weren't up for so much scrubbing. Embrace the laziness! :)
We did do this on this particular piece simply because it was such a huge sculpture. You don't have to do it.
This particular piece was filled with so much detail, we would have scrubbing for hours. We wanted to do it fast.
We simply weren't up for so much scrubbing. Embrace the laziness! :)
The Pal Tiya Crew and friends are now waiting for the spring to finally arrive in New Zealand so we can all get back together and paint this piece... we will post when this is done, we promise :)
Painting Time
It’s been a hot 🔥minute … ok, over a year since we finished sculpting this using Pal Tiya Premium. ⏱️
We finally got everyone who worked so hard on the Great A’Tuin inspired birdbath together 😝 & started painting this one!!
👩🏾🤝👨🏽👨🏻🤝👨🏼👩🏽🤝👩🏾
We painted Atuin as part of a group. First we primed the sculpture with a clear white paint, using a rattle can for quickness.
This will cause the colors to glow from within. We used an airbrushing technique so more of us could work together. The technique is to lay on many translucent layers, the lightest colors first, then move in a sequence to progressively darker colors.
We must take the time with each layer to put in the correct patterns, blending and contouring. These are strengthened with each subsequent pass. This technique keeps the colors crisp and undiluted.
The first two layers were pale yellow. This color appears nearly everywhere even under the darker brown patches. The next two were a translucent pumpkin orange. This appears in a slightly smaller percentage of the surface area. The yellow will glow through making a richer color.
The next color is a bright hot red. This took time to become bold enough to capture the "pineapple" pattern within the scales.
We'll be getting even more of the gang back together in the coming weeks to finish the whole job so stay tuned for that...
|
|
|

