Making a Snow Leopard
written by Kim Beaton & Yvonne Anderson / June 2023
|

|
Making a Snow Leopard using Pal Tiya Premium
This project was done in collaboration with Scale Studios in Lower Hutt, Wellington, New Zealand. They provided the work space and artistic oversight for the entire project.
A digital model was built by Macgregor Allen to the client's satisfaction. This was a portrait of one of a pair of snow leopard sisters for Wellington Zoo, Asha and Manju. This Pal Tiya Premium sculpture was of Manju.
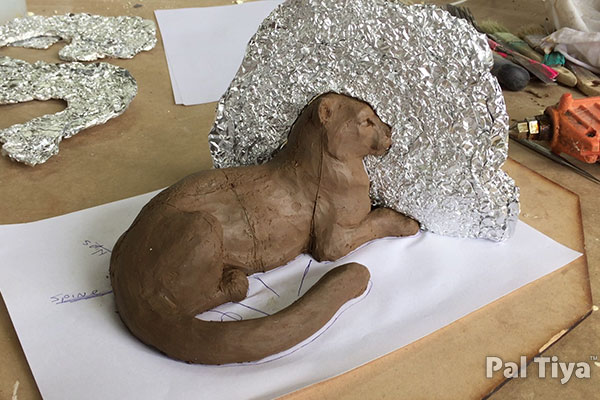
Our Co- Founder, Kim Beaton took the digital maquette and rebuilt another small one out of clay. Why? Because it causes the artist to truly examine every inch of the surface and correct how light interacts with a piece in the real world. A 3-D printed model would also have worked, if you have access to that sort of tech.
Maquette study model of the making of a snow leopard
The approved design as a clay maquette for a 2x times larger version of the big cat.
Kim and the other sculptors used very low tech techniques for the construction, basically hot glue, cardboard, foil, tape, Pal Tiya Premium and plastic sheeting.
This project was done in collaboration with Scale Studios in Lower Hutt, Wellington, New Zealand. They provided the work space and artistic oversight for the entire project.
A digital model was built by Macgregor Allen to the client's satisfaction. This was a portrait of one of a pair of snow leopard sisters for Wellington Zoo, Asha and Manju. This Pal Tiya Premium sculpture was of Manju.
Our Co- Founder, Kim Beaton took the digital maquette and rebuilt another small one out of clay. Why? Because it causes the artist to truly examine every inch of the surface and correct how light interacts with a piece in the real world. A 3-D printed model would also have worked, if you have access to that sort of tech.
Maquette study model of the making of a snow leopard
The approved design as a clay maquette for a 2x times larger version of the big cat.
Kim and the other sculptors used very low tech techniques for the construction, basically hot glue, cardboard, foil, tape, Pal Tiya Premium and plastic sheeting.

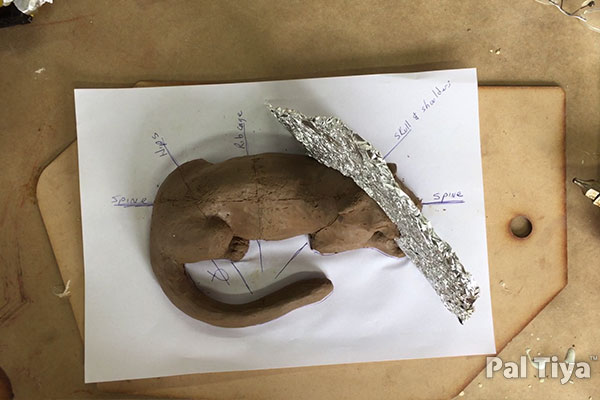
Here the Maquette has the basic cross sections drawn on it. The foil wall is a way to capture the complex outline and transfer it to paper. From the paper the outline can be enlarged onto cardboard. Notice the careful labeling and position on the base silhouette.
|
|
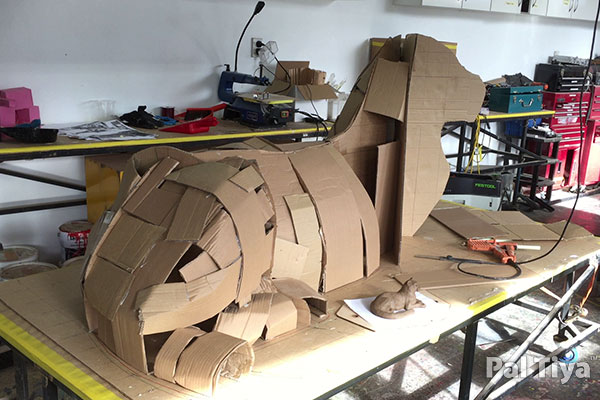
Cardboard core silhouettes for the snow leopard
The cardboard cross sections are hot glued together. The critical cross section is the base silhouette. All the other vertical sections are aligned to this one.
The cardboard cross sections are hot glued together. The critical cross section is the base silhouette. All the other vertical sections are aligned to this one.

To save money and time we built out cardboard straps to get closer to the actual size. This took only about an hour to do and saved a vast amount of foil.
Cardboard bulking out is done.
The reason this technique is so successful is we know the scratch coat of Pal Tiya Premium just doesn't weigh that much. We know it looks fragile, but the cardboard/foil core only has to hold up a very thin layer. Once the scratch coat is firm, that will hold the remaining weight easily.

|
|
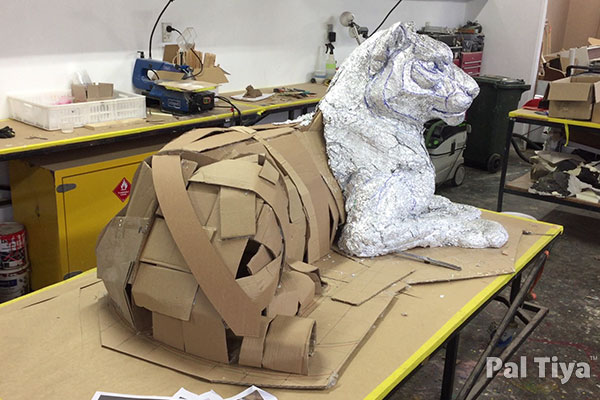
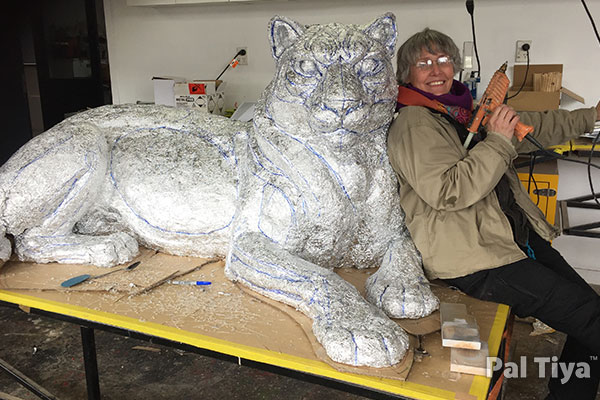
Foil time for the snow leopard, Manju
We began filling out the Leopard with hot glue and foil. The face is the most important part, so it was established first.
We began filling out the Leopard with hot glue and foil. The face is the most important part, so it was established first.
|
|
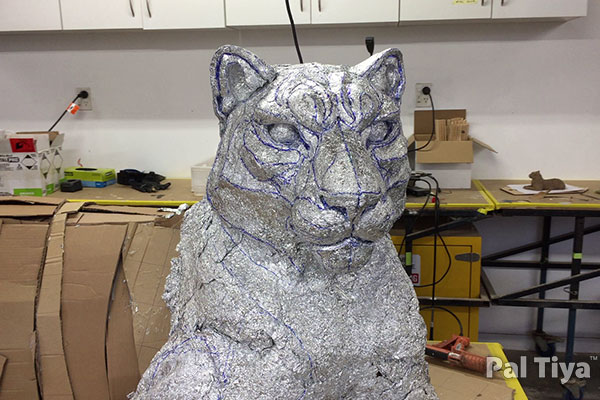
The symmetry on the face is most easily done with felt tip pen markers and measuring carefully. We created an almost Art Deco, faceted face so the shapes will read more clearly when they are coated with Pal Tiya Premium.
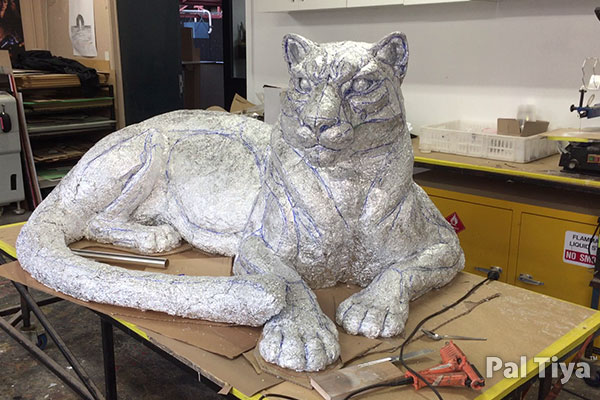
Completed foil. What a lovely figure!
|
|
|
Figuring out how much Pal Tiya Premium is needed Estimating the surface area with carefully measured towels. All the various shapes of towel were known fractions of a square foot, so even the tiny pieces could be added up properly. The photographs helped to keep track of what we had covered. Please note: for some artists/sculptors, this method works well and for others, we've created a handy calculator here We calculated 49.3 square feet surface area for the snow leopard itself |
|
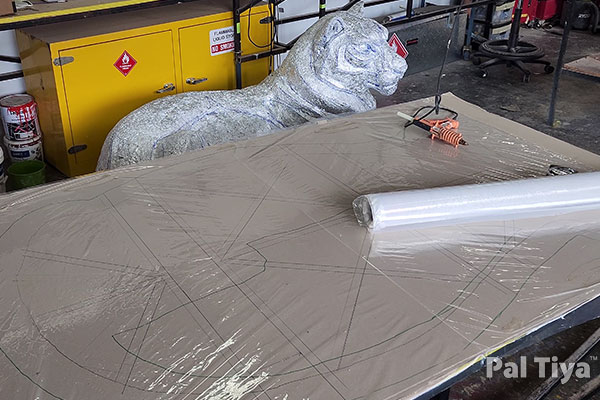
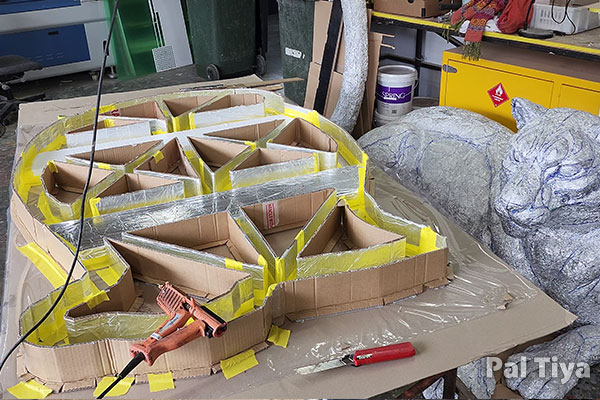
Foundation for making a snow leopard
A cardboard pattern was drawn to determine the foundation and truss like supports. Plastic was secured down over it, so the foundation could be removed from the table. Many cardboard strips 4 inches (10cm) high were cut. One side was coated with cello tape/packaging tape to make them waterproof. These were taped down along the inside edge to the base plastic sheet. Hot glue strengthened any overlaps between cardboard strips.
A cardboard pattern was drawn to determine the foundation and truss like supports. Plastic was secured down over it, so the foundation could be removed from the table. Many cardboard strips 4 inches (10cm) high were cut. One side was coated with cello tape/packaging tape to make them waterproof. These were taped down along the inside edge to the base plastic sheet. Hot glue strengthened any overlaps between cardboard strips.
We did not pour a solid slab. Why?
We could have used a normal pouring concrete for our foundation, but using this would have required a lot more labor and hidden costs to an aspiring artist
The additional time to:
By using Pal Tiya Premium’s ability to be strong in thinner cross sections, means that we stayed with the considerably lower tech of cardboard and tape, and simply back-filled this with one material.
Our aim is to always be making art (and even big stuff like this) as achievable and as accessible as possible.
Part of our process is to keep our methods, tools and techniques within what an ordinary person could achieve.
Tape, plastic, hot glue, cardboard, Pal Tiya Premium.
Certainly we had a very large mixer, but we have used a standard Kitchen mixer to build figures of this size before ... no joke :)
We could have used a normal pouring concrete for our foundation, but using this would have required a lot more labor and hidden costs to an aspiring artist
The additional time to:
- Rent/transport/clean/return a mixer
- Purchase the greater amount of concrete
- Time and materials to build a more substantial foundation wall to handle the heavier concrete
- Purchase, cutting, bending and placing the rebar
- The skill to do all of this
By using Pal Tiya Premium’s ability to be strong in thinner cross sections, means that we stayed with the considerably lower tech of cardboard and tape, and simply back-filled this with one material.
Our aim is to always be making art (and even big stuff like this) as achievable and as accessible as possible.
Part of our process is to keep our methods, tools and techniques within what an ordinary person could achieve.
Tape, plastic, hot glue, cardboard, Pal Tiya Premium.
Certainly we had a very large mixer, but we have used a standard Kitchen mixer to build figures of this size before ... no joke :)
|
|
|
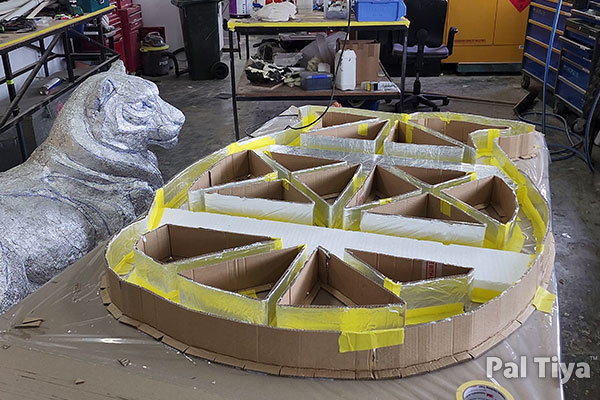
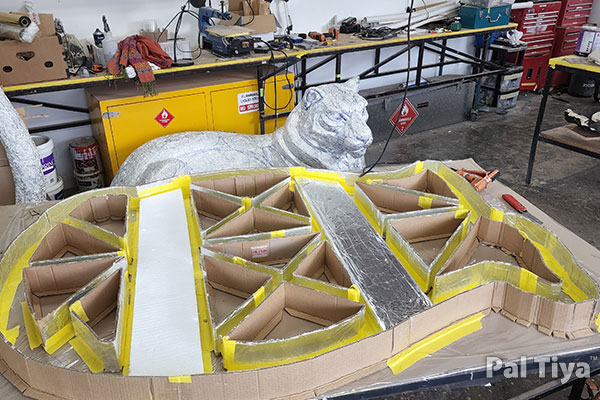
How did we design this pattern? A few simple rules:
- A 4 x 4 inch (10 x 10 cm) thick band around the outside. Essentially a concrete curb surrounding the piece
- Place 2 x 6 inch (5 x 15 cm) panels to create hollow spaces for either forklift tines or transport straps to go under the sculpture (these are white and silver in the pictures)
- The remaining areas are supported by 1 inch (2.5 cm) wide triangular trusses for the greatest strength and least material
A note about foundations: If possible, include them in your sculpture. It makes installation on the day for the client so much easier. You simply lift and place the sculpture where it belongs. Job Done. Otherwise it is so much more effort to hire the workers on the day to prep and pour the foundation separately. Having the foundation included can also make your sculpture significantly stronger. This Snow Leopard is a perfect example.
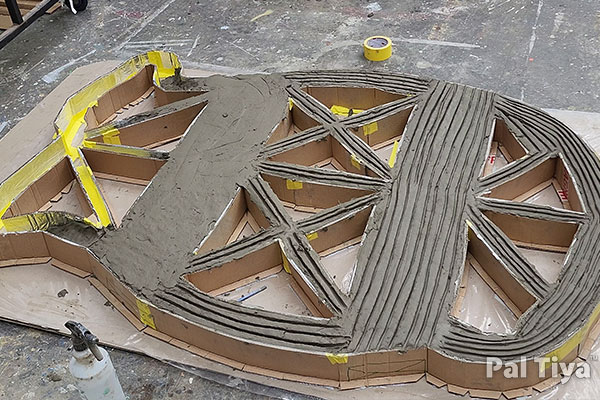
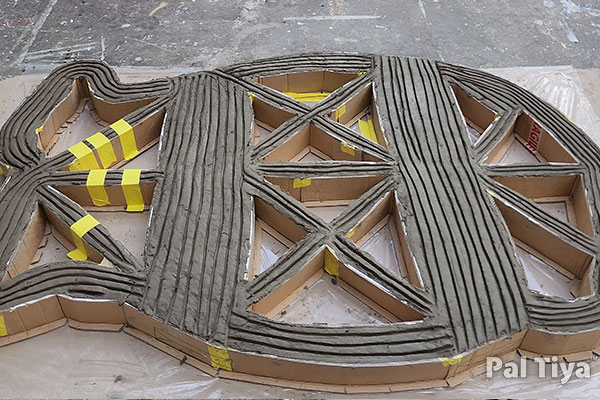
The foundation pattern was moved to the workshop floor where the forklift would have easier access when the leopard was complete. The cardboard formwork filled up many sequential batches of PTP. The deep grooves are for grip so attaching the Leopard on top will have a strong mechanical connection
|
|
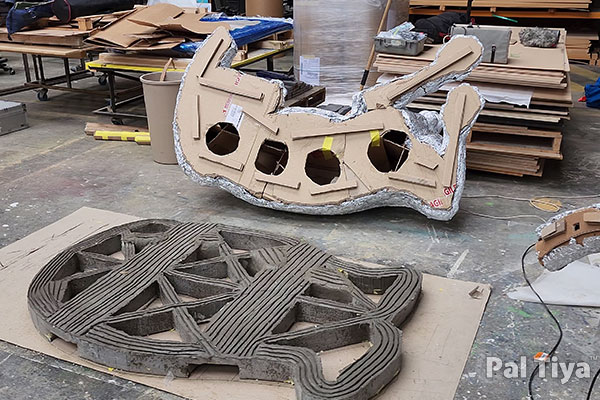
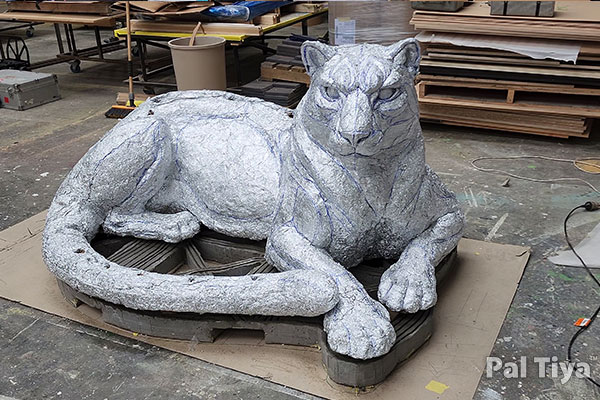
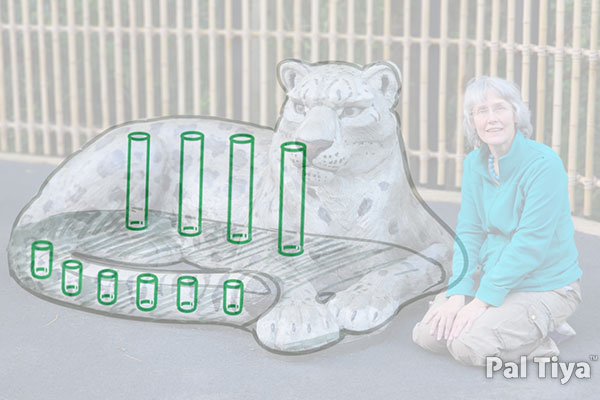
See the holes under the leopard below, along its spine, and the top of the tail? These are for internal supports on weight critical areas. People will be climbing all over this particular figure, so we made locations for solid pillar supports of Pal Tiya Premium about 3 inches wide.
These would transfer the weight from the outside skin, through the leopard and directly to the foundation. The supports were assembled separately. We made simple cylinders of cardboard and lined them with plastic, then filled them with Pal Tiya Premium. Once cured, these pillars can hold considerable weight.
These would transfer the weight from the outside skin, through the leopard and directly to the foundation. The supports were assembled separately. We made simple cylinders of cardboard and lined them with plastic, then filled them with Pal Tiya Premium. Once cured, these pillars can hold considerable weight.
|
|
The first batch of Pal Tiya Premium glued the outside edge all the way around. You can see the tail support pillars set every 4 inches in the tail, protecting an area as wide as a person's foot.
The internal pillar supports were placed at this time too. You will see this in the video at the end of the article.
The internal pillar supports were placed at this time too. You will see this in the video at the end of the article.
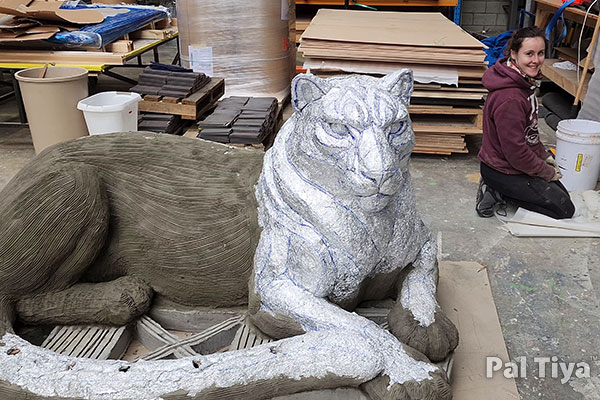
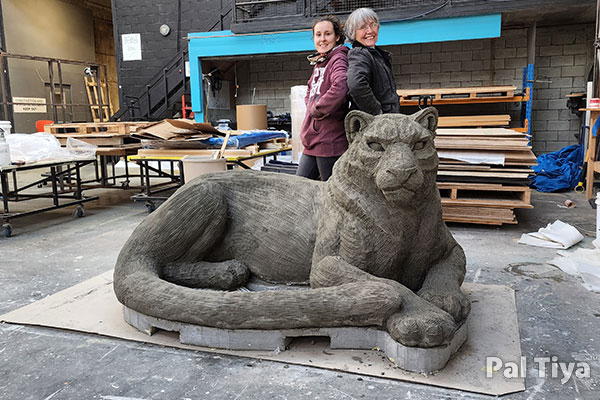
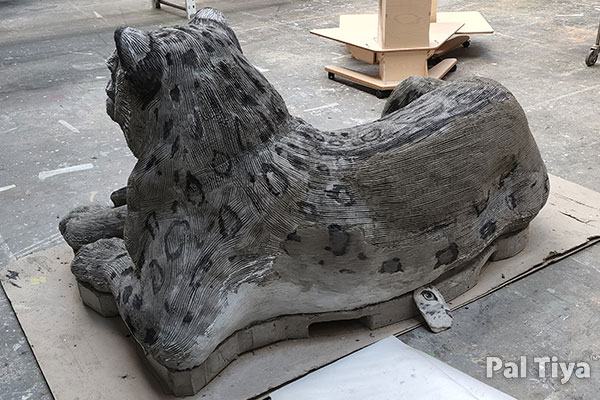
The scratch coat completed in a day with the visiting artist Marion Vegas.
|
|
A note about texture. On the face, the scratch coat lines changed direction on each facet of the face. This helps enormously in keeping track of the essential forms and anatomy. Otherwise they can get soft and confusing to follow.
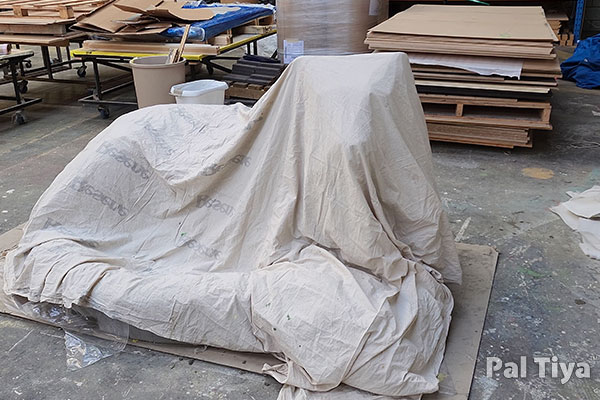
Curing the snow leopard
Wetting down and wrapping for strengthening and curing. This was done diligently every day for the entire process. Full curing instructions here
On the first day, Pal Tiya Premium should be wrapped under plastic only, any day 2 onwards work should be wrapped in wet towels, sheets etc and then re-wrapped under plastic sheeting.
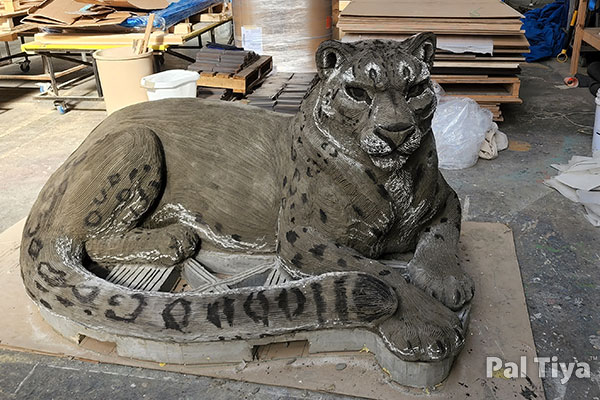
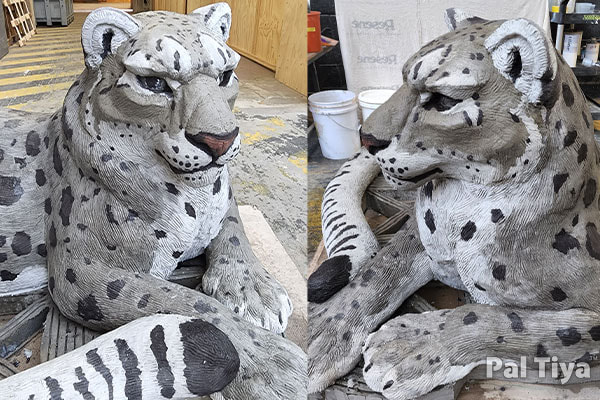
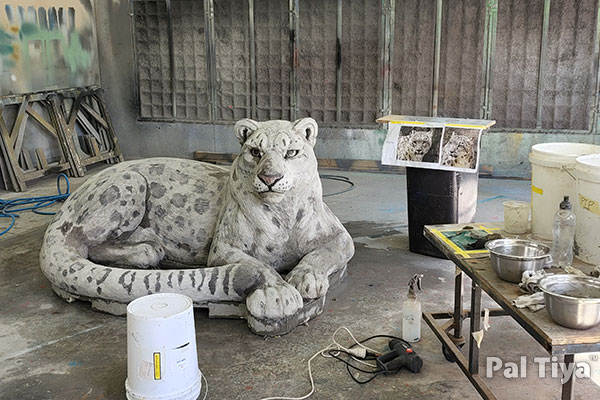
Coloring
Using white chalk and watered down black oxide, the pattern of spots was carefully established. This was a portrait after all, of the first Snow leopard to be in Wellington, Manju.
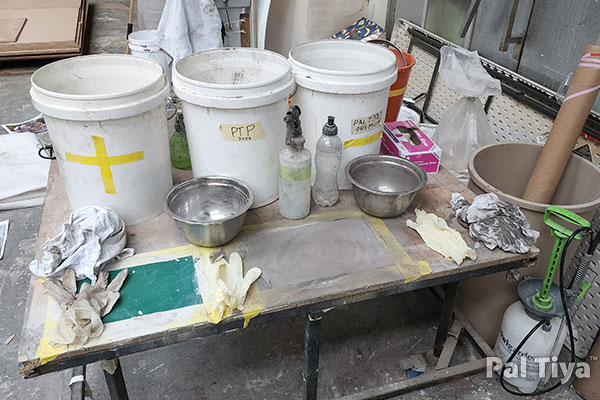
Our station for mixing the white, gray and black batches of Pal Tiya Premium can be seen below. To find out about mixing oxides including amounts etc, please go to our FAQ page here
Further mid tones could be mixed on the fly by combining some of the small batches together.
It's surprising how little space you actually need for mixing. The separate colored container of Pal Tiya Premium, its specific mixing bowl, secured plastic sheet, towel and gloves. The gray and black shared a plastic sheet because the residual of black oxide was microscopic.
|
|
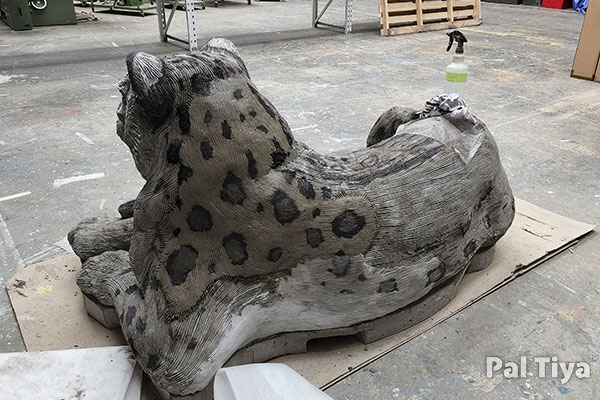
The coloring begins. This is accomplished with scagliola, an ancient Italian technique of using tinted batches of clay 6 mm thick. This will keep the colors true and undiminished outdoors. It is also impossible to wear off, now matter how many children play on it over the coming decades. They cannot wear down past the layer of color. This also makes it easier for the Zoo to maintain.
We began in an out of the way location on the back at the bottom to discover the flow and feel for the texture. Since we are both painting and coloring at the same time, progress is careful, slow and at a relaxed pace.
The back shoulders. We will leave the face to last, where it is most important to do a confident job.
|
|
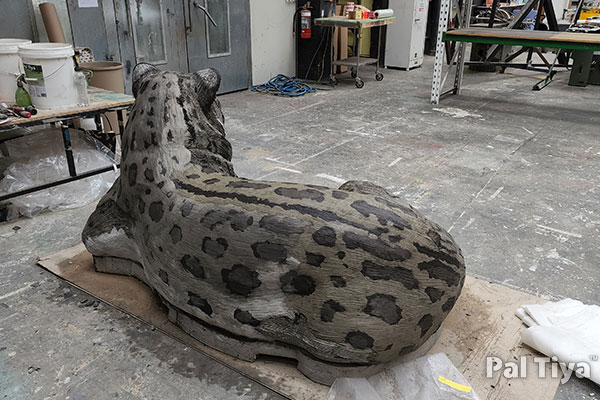
Back and hips
Around the font
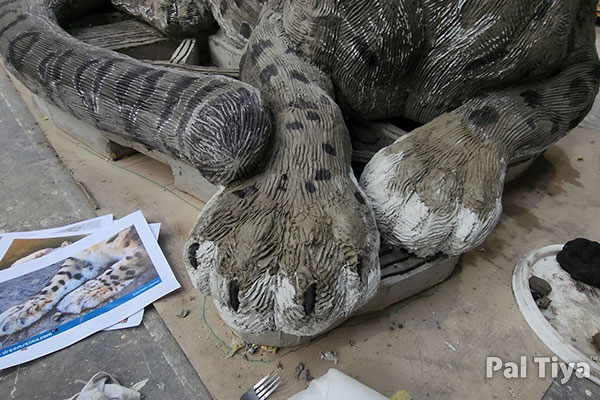
Why the BIG..........................................paws?
|
The scagliola technique up close
This technique has been around for centuries. Essentially you mix up several small batches of different colored clay and apply them to a surface in a pattern. Wet the surface lightly so the Pal Tiya Premium sticks better. |
|
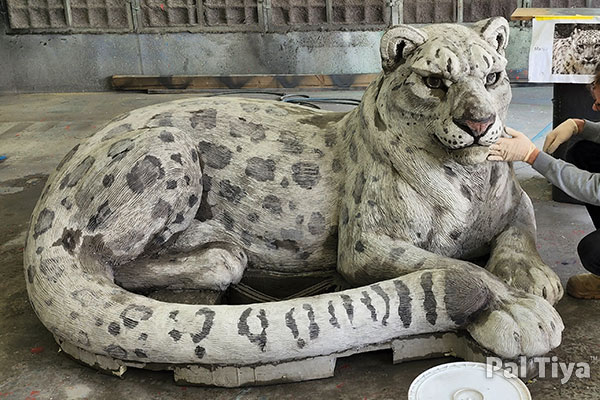
Manju's face
At long last, Manju’s face! A note about symmetry. To achieve a symmetrical face, work in very small batches on the centerline first. About 4 inches wide at most. The farther away from the center, the less symmetry matters. But on the center-line it is vastly important. Work slowly and make sure the patterns and volumes are correct.
Final strengthening and curing
After 28 days of the final cure and strengthening, the snow leopard was scrubbed with citric acid to remove any efflorescence. A final bath of baking soda neutralized the citric acid.
We then took the time to touch up and improve the texture with a hand grinder. We could carefully direct the flow of the fur and correct any odd lines, details and shapes.
|
|
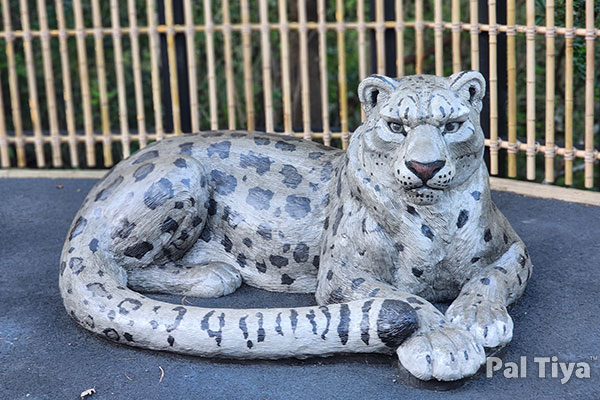
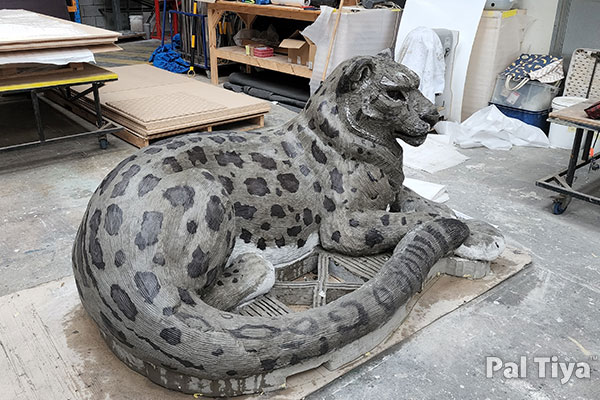
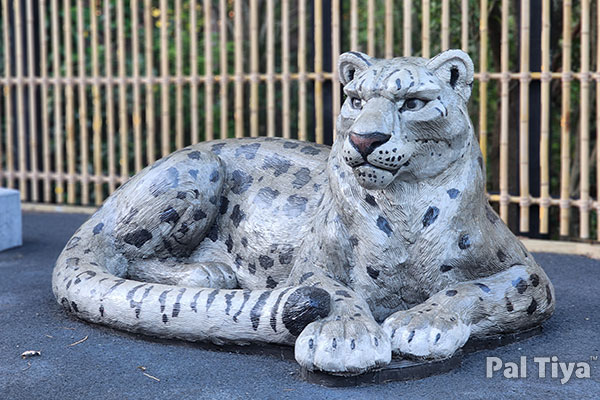
To complete the Snow Leopard, it was dried thoroughly and a coat of solvent based Drive Seal was applied. This allows the colors to glow and come to their final color.
The final sculpture was transported with a forklift to the Zoo.
Totals:
760 lbs, 344 KG
19 bags TOTAL of Pal Tiya Premium
8 bags in the foundation
9 bags in the surface
2 bags interior supports along the back and in the tail
170 hours approx. The tinted three color Scagliola process was very slow and time consuming.
3 x 3 x 6 feet (90 x 90 x 180 cm)
49.3 sq feet surface area, not including foundation (15 sq meters)
If you are in the USA, contact us here to find out about discounts for large quantities of Pal Tiya Premium
Brandon Love
"Pal Tiya Premium is, without a doubt, the new revolution of outdoor sculptures. The versatility of this super sculpting medium is endless.
If you are interested in creating massive, ultra-strong, fully weather proof works of art, this is product for you!"
Currently Pal Tiya Premium is available in USA, U.K, Australia